Happy New Year Love Notions Sewing Friends, Mary Anne here from the Sew Mary Mac blog. I’m always happy to be back on the Love Notions Blog, and today it’s all about the Clef Coat Collection. I’ve got some simple ideas to help you elevate the inside of your Clef Coats that I can’t wait to share with you.
But first the details~ it’s $5 Feature Friday and today the whole Clef Coat Collection is on sale! The Ladies Clef Coat, Mens Bass Clef Coat and Kids Treble Clef Coat are all on sale for just $5 each! It’s a really quick satisfying sew, but you can add a few additional steps to make it a really special. Keep reading to get all the details!
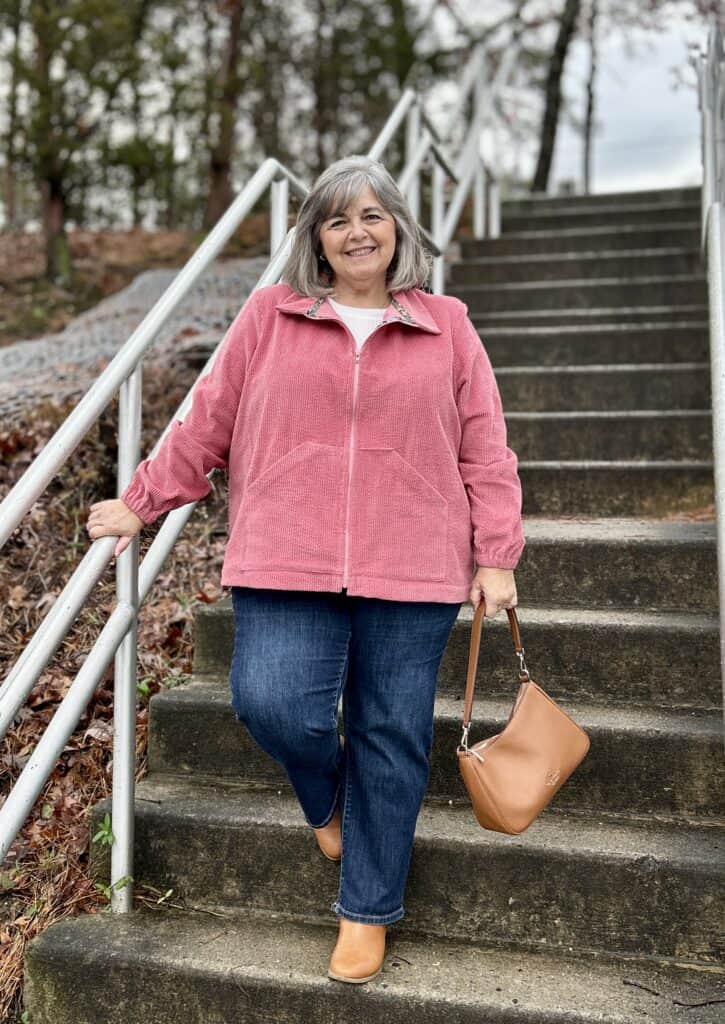
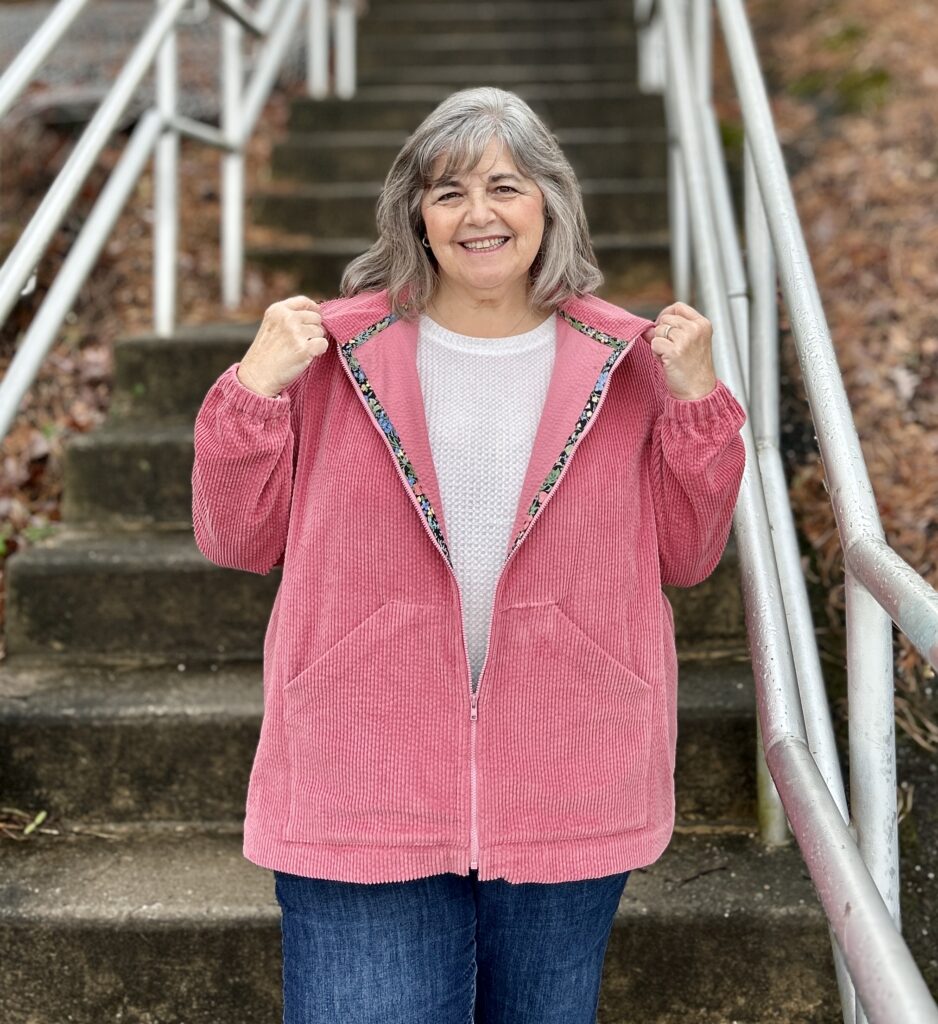
Finishing Touches to Elevate Your Clef Coat
1. FRENCH SEAMS
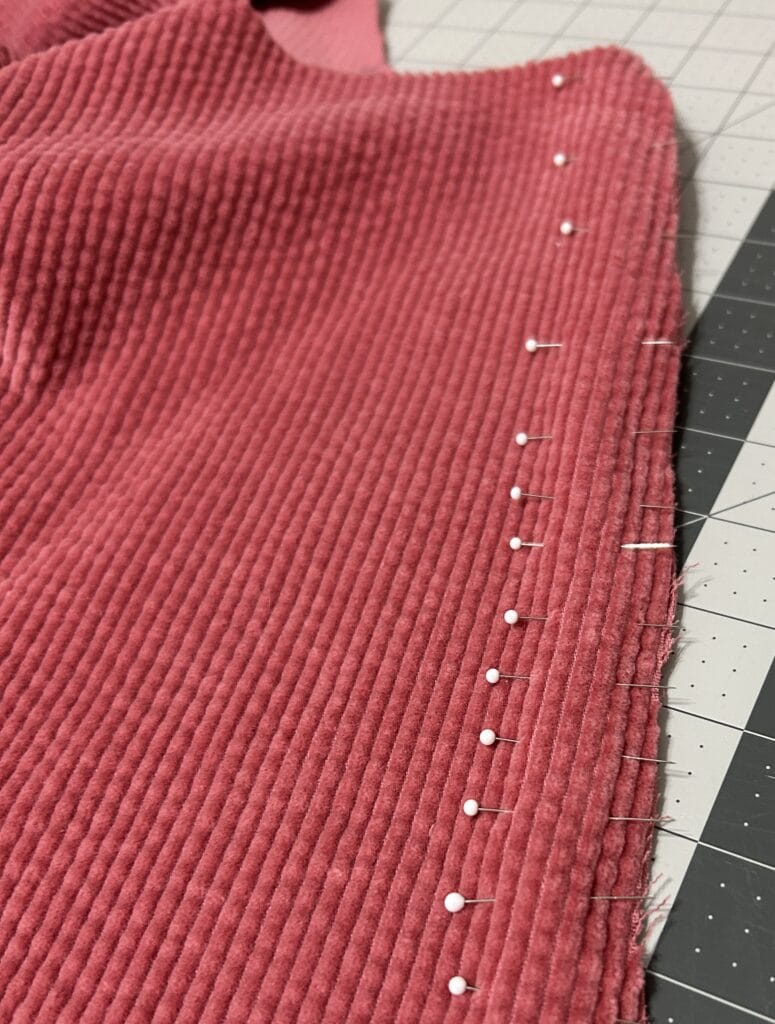
I chose to sew French seams on the side seams and the sleeve seam to give the inside a cleaner look. In order to sew French seams, you need to increase the seam allowance to 1/2″ instead of 3/8″. To do this simply add 1/8″ to the side seams of the front and back pattern pieces as well as the sleeve seam. Choosing to sew these seams as French seams means that you will be sewing the side seams before inserting the sleeve. The sleeve will then be inserted “in the round” after the side seams are sewn.
How to Sew a French Seam
- Pin front and back together at the side seams Wrong Sides Together.
- Stitch a 1/4″ seam
- Trim seam to 1/8″
- Press seam allowance to one side
- Turn coat wrong side out, press seam really well.
- Pin the side seams Right Sides Together.
- Stitch a 1/4″ seam
- Press seams well again.
- Repeat this process for each sleeve.

2. INTERFACING
The Clef Coat does not require interfacing in the collar. I have worked with this Washed Corduroy before and I know that it is very soft and has a bit of a drape to it. I knew that I would want it to have a bit more structure. I used a lightweight knit tricot interfacing on the collar and it worked out very well. When zipped all the way up, the collar does not flop.
Pocket Edge Finish
- Page 12, Step 1~ finishing the slanted edge of the pockets
- Instead of finishing with a serger, I chose to use bias tape.
- The bias tape added stability to the pocket edge so it would not be “droopy”.
- After applying the bias tape, I finished the top, short side and bottom of the pocket with my serger.
- Again, I knew this would be best for my fabric. If your fabric has more structure you wouldn’t need to do this, however it does give it a very professional look.
- See below if you need more details on how to do this.


3. ZIPPER FINISHING
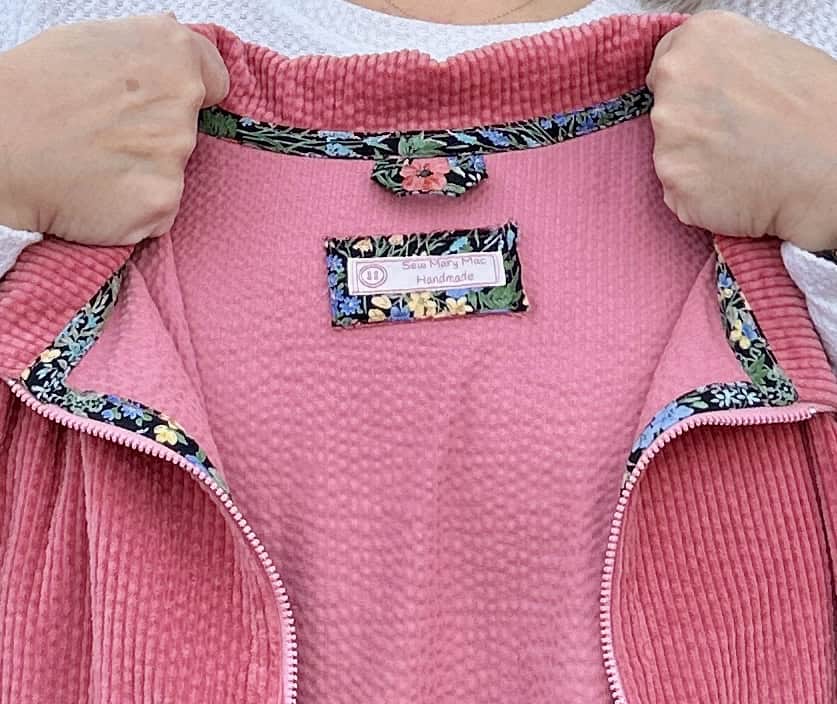
Another way to elevate the insides of your Clef Coat is to cover the zipper tape. You can use prepackaged bias tape or make your own. If making your own, you could use the same fabric as your coat. If your coat fabric is thicker, then you can use a cotton or linen fabric. Match your coat fabric, or go with a contrasting color or print. You can even use twill tape. Whatever you choose to use, I would use the same for the collar, pocket finishing, zipper finishing and hem finishing.
- Insert the zipper as per the tutorial.
- I used 1 ¼” strips of the bias tape I made.
- Pin the bias tape over the zipper tape close to the zipper teeth. Make sure to insert the end of the tape up into the collar area. You are only pinning the tape to the zipper tape NOT through to the outer coat fabric.
- Hand or Machine baste in place. Stitch in place.
- Pin the outer edge of the bias tape in place, the hand or machine baste. You will be going through the outer fabric of your coat.
- Stitch outer edge of tape in place. This will be visible top stitching on the outside of your coat.

4. HEM FINISHING
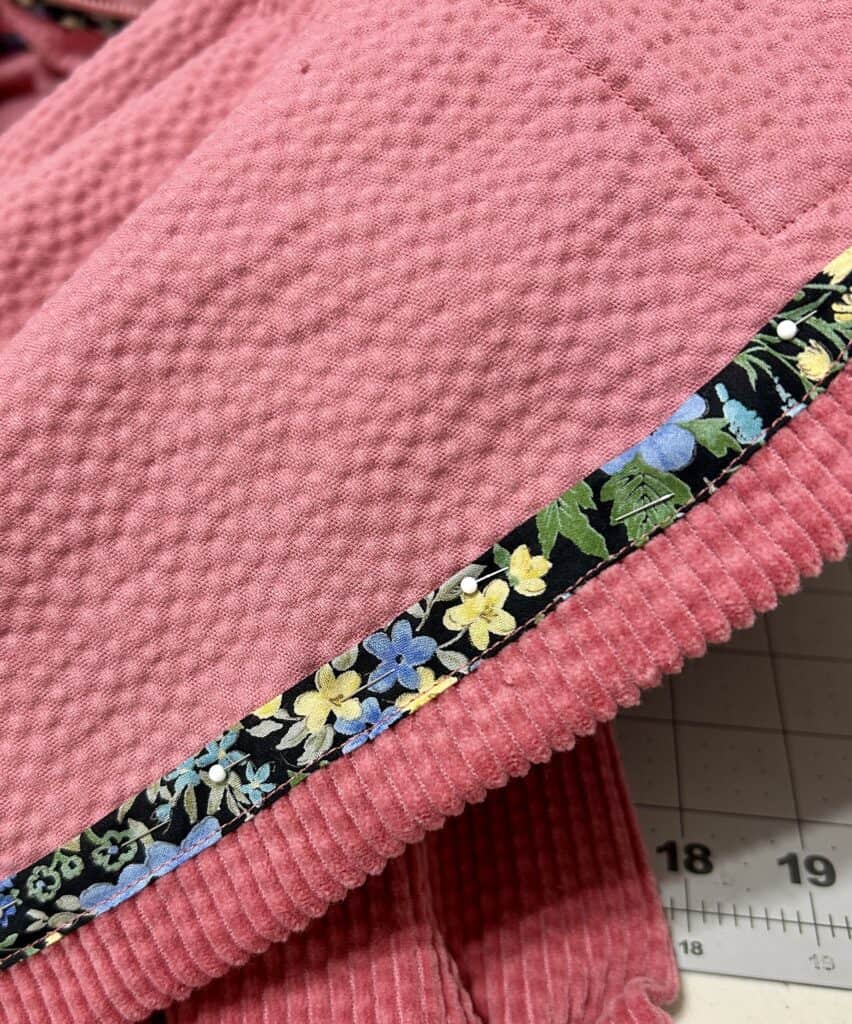
Page 23, Step 1 instructs you finish the raw of the hem with a serger, overcast stitch, bias tape or by turning under 1/4″. I finished mine with bias tape, and I feel it was just one more way to elevate this coat. It only took a few minutes extra to do this and I think it was well worth it! This method really gives you a nice clean professional look.
To Apply bias tape to the raw edge:
- Open one side of the bias tape.
- Align the raw edge of the bias tape with the raw edge of the hem. Be sure you place the right side of the bias tape to the wrong side of the hem edge.
- Stitch bias tape to the hem along the crease in the tape.
- Fold the tape over the raw edge of the fabric to the right side
- Topstitch in place.
- Your raw edge will now be encased in the bias tape.
- Turn to the inside and hem as indicated in the tutorial.

Some Extra Little Details
5 . HANGHING LOOP
Adding a Hanging Loop
- Cut a piece of bias tape 4″ long and stitch the long sides together.
- Fold and press bias tape as pictured
- Place the loop at the center back neckline.. Pin in place.
- Stitch in place when securing the inside collar or finishing the seam of the hood.
6. LABEL
Add a label. I love attaching my labels to a scrap of fabric and then stitching to the inside of my me made garments.


7. BIAS TAPE
A really simple way to elevate your Clef Coat is with the bias tape and zipper you use. My only local (30 min or less) option is Joann Fabrics who has a very limited color choice on both of these items. Often the colors available won’t match the fabric we want to use. Choosing a contrasting color is always an option, but sometimes that just isn’t the way you envisioned your project to look.
Solution~ Make your own Bias Tape!
I often make my own bias tape. This way I can buy fabric that matches my garment color. For this Clef Coat, I chose to use a Japanese floral print from my stash that I’ve had for a few years. Unfortunately I didn’t purchase enough for the intended project but it’s perfect for this project!
Never made your own bias tape before? Visit this Love Notions Blog Post for all the details.


8. ZIPPER MATCHING
It’s so hard to match sometimes!! Again, my local store has so few separating zippers. The selection of 22” zippers is dismal. I am lucky enough to live close enough to the NYC Garment district, so I do go there every 1-2 months to stock up on supplies. My favorite shop for zippers is SIL Thread at 257 W. 38th Street. Whenever I am going into the city I always bring fabric swatches for any zippers I think I may need. Not only do they have 100’s of separating zipper colors to choose from, they will shorten them for you for $.50 each.
Now you may think this information won’t help you~ but you’d be wrong. You can order from them online! Their online color chart is also very accurate! I recently ordered 3 separating zippers for Oakley Vests I’m planning to make and all three matched perfectly! Visit their online store at www.zipperandthread.com
My favorite zipper for the Clef Coats and Oakley Vest are the Vislon Molded Nylon Zipper(size #3). You can find these zippers HERE. (They are just $3.00 each!)
This corduroy Clef Coat is the 8th Clef Coat I’ve sewn. (Six for me and two for my husband.) To read all about my entire Clef Collection visit my blog post “A Closet Full Of Clefs” on the Sew Mary Mac Blog HERE. You can also read about any modifications I made to this version there as well as an additional discount code there.
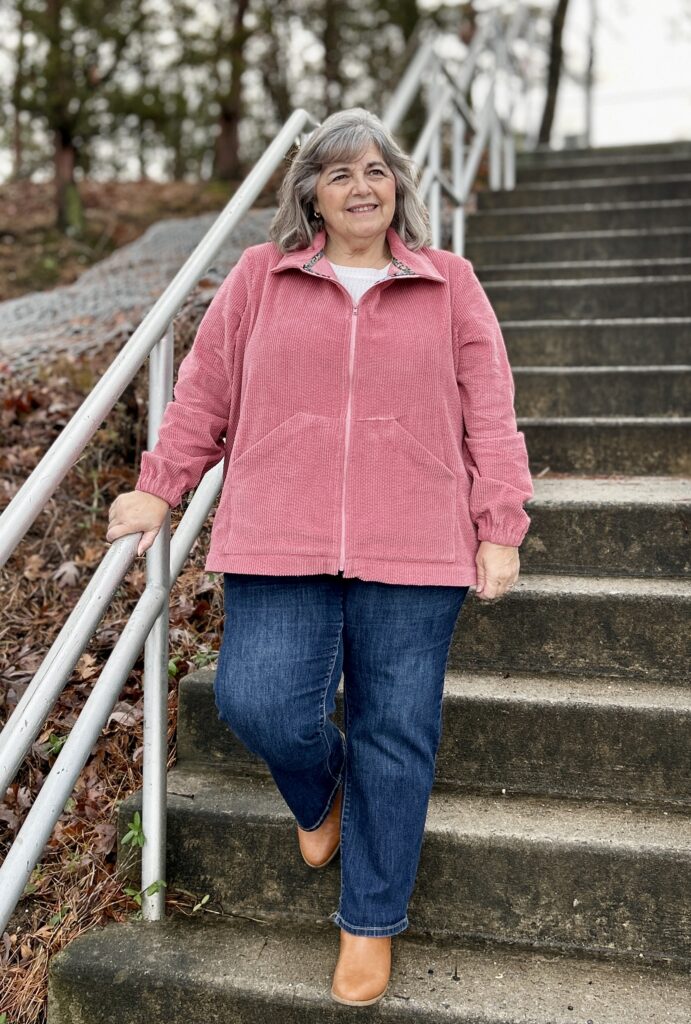
For more details on my sizing and additional sewing tips for the Clef Coat, visit my original blog post “The Clef Coat Joins the Love Notions Line Up” at Sew Mary Mac. You can find that post HERE.
If you use Instagram, consider following me @sewmarymac to see all my latest makes. You can also follow/like my Facebook page, Sew Mary Mac.


