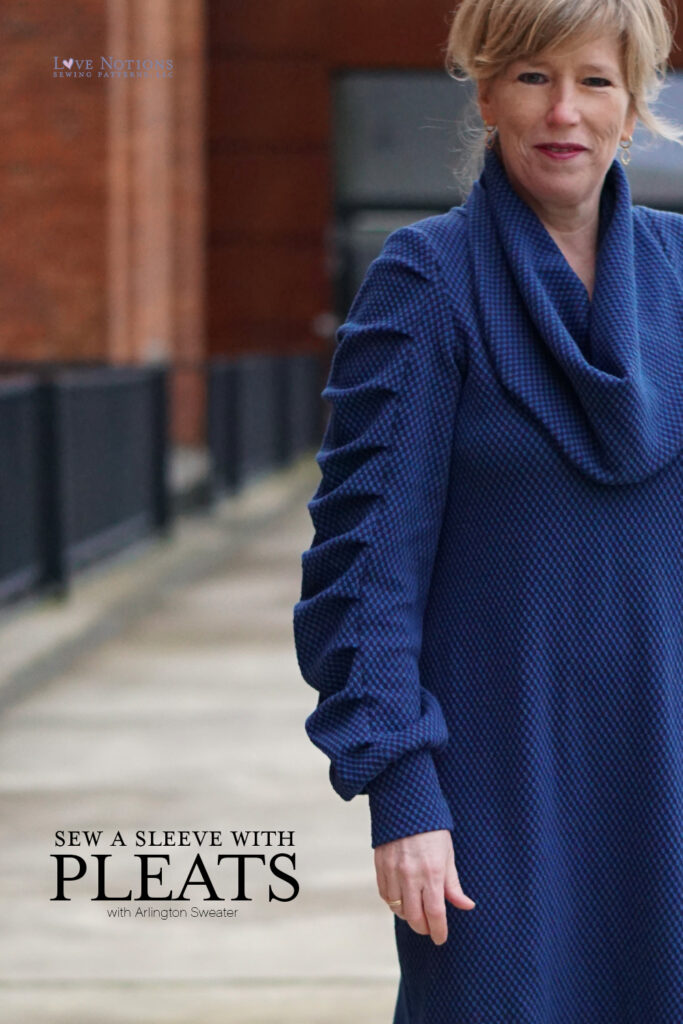
Dear sewing friends, especially for this Feature Friday I got to work on one of my favorite Love Notions patterns, the Arlington Sweater! From the very first line drawings that Tami showed us, I was a fan, because in winter I love nothing more than a turtleneck or a cozy cowl to snuggle up in. So I hope I can inspire you a little bit today with my take on the Arlington top & dress. And if you don’t have the copy yet, maybe now it’s the time to add it to your collection because it’s only $5. Read along and find out how to transform this essential into a statement.
Ilse @sewsewilse

@sewsewilse
Follow Ilse for more striking sewing inspo.
Ideal Hack Foundation
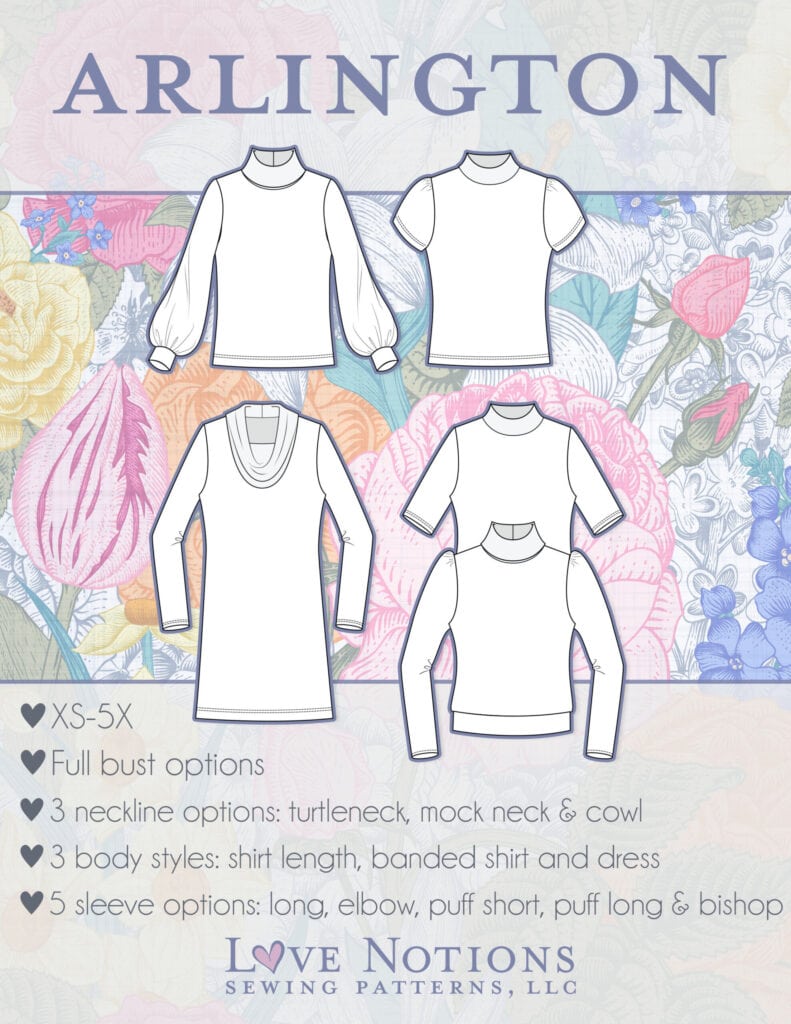
With the Arlington, you can actually pull off quite a bit. Because in addition to the top length, you also have the dress length. Tami drafted 5 sleeve options. And if you add to that the three neckline options, I think you could fill an entire closet with these combinations: 2 lengths x 5 (sleeve options) x 3 (neckline options) = 30 configurations! Imagine if I had one of each option! But…without exaggerating, I still think I am approaching a dozen Arlingtons already. As a t-shirt, as a sweater…an Arlington goes with any outfit, in my opinion.
Let’s get to it!
How to Sew a Pleated Sleeve
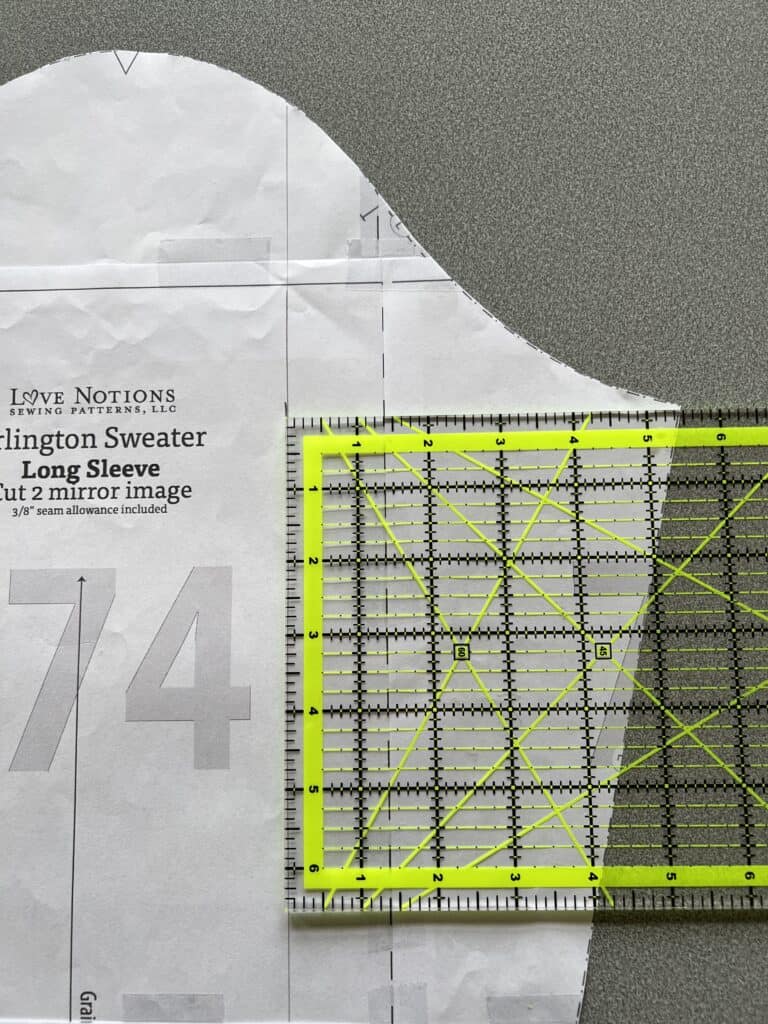
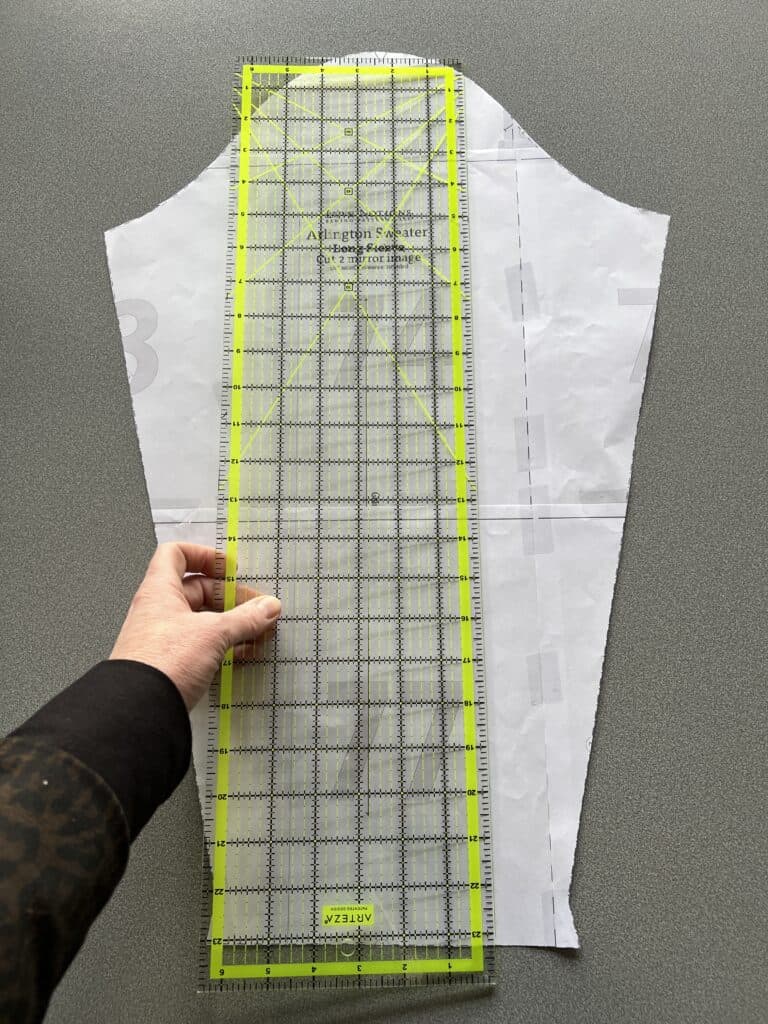
- To make this special sleeve, I start with the basic long sleeve. You could basically apply it to any sleeve length.
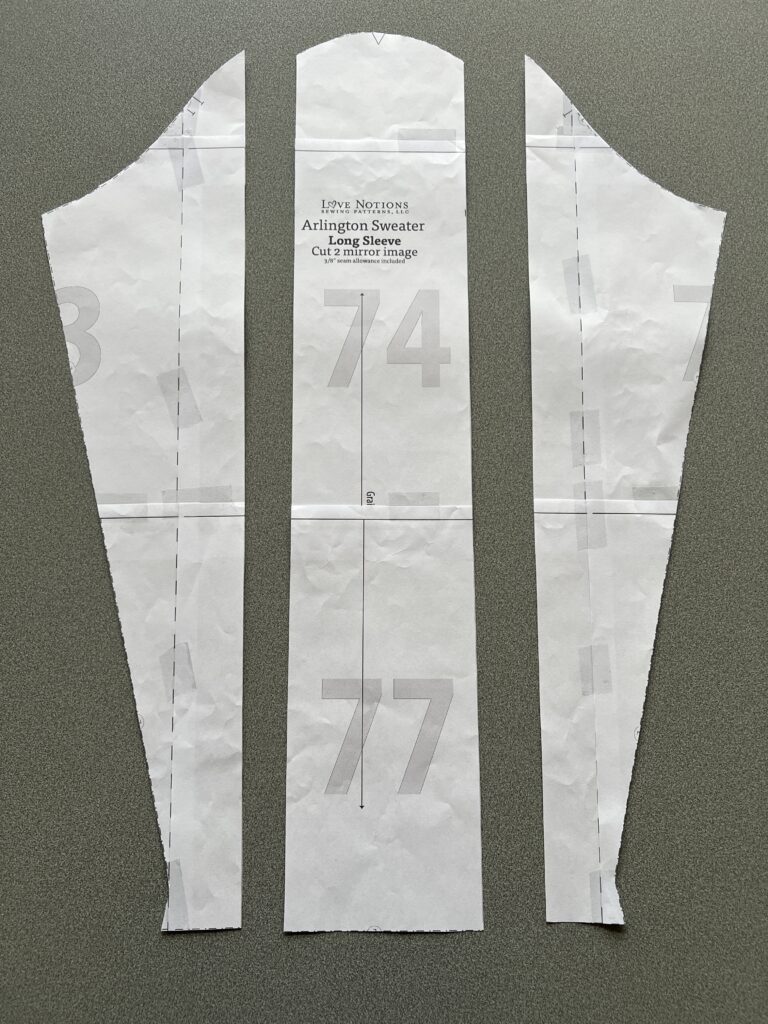
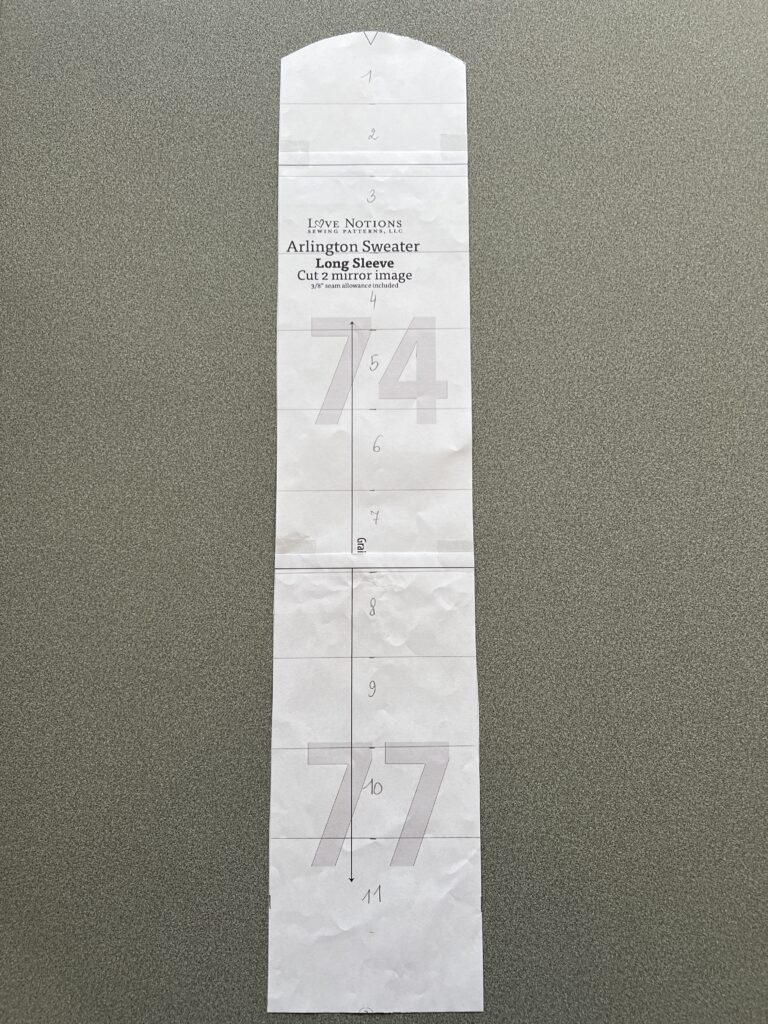
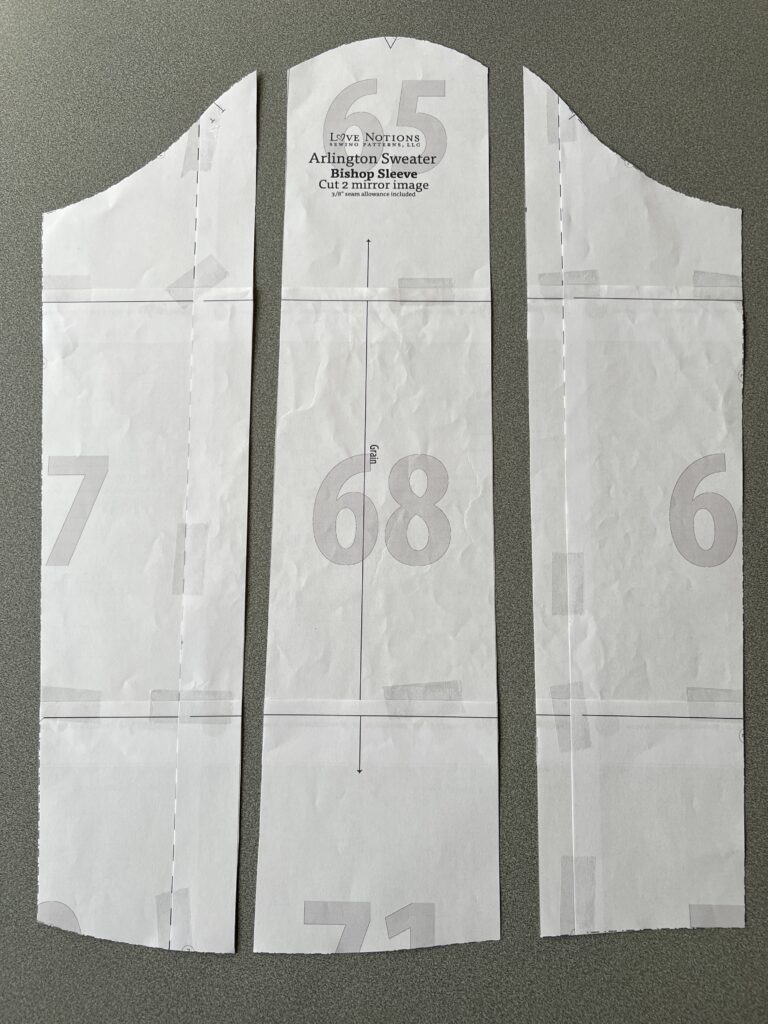
- I divide the sleeve into three parts keeping 5.5” on both sides.
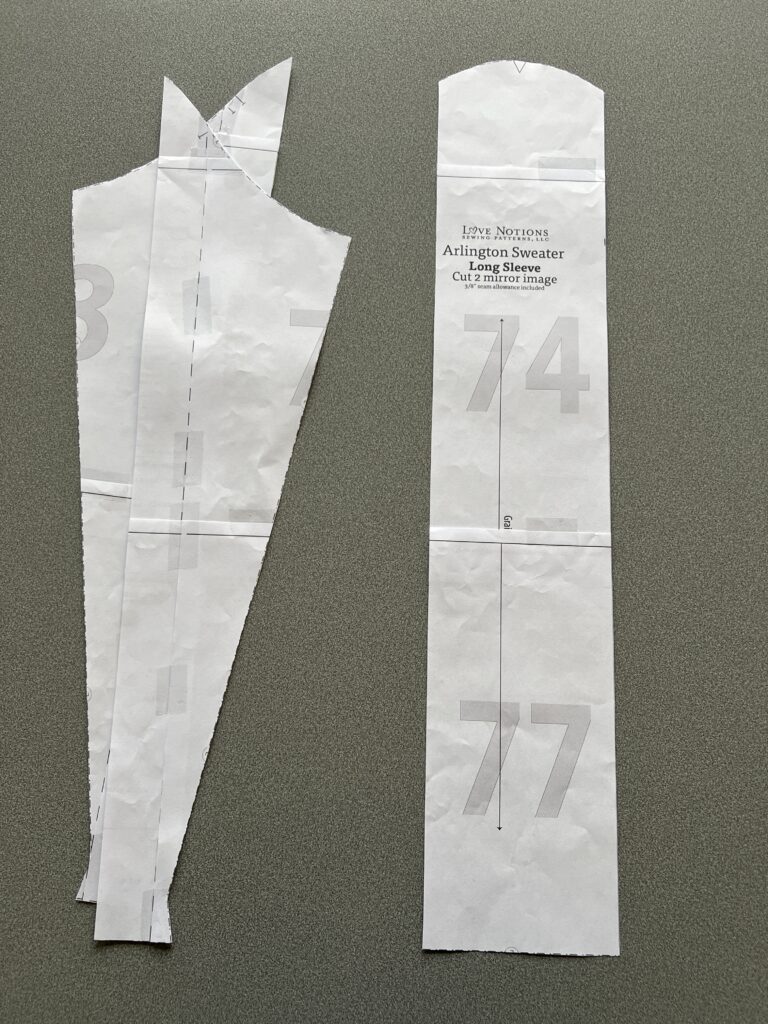
- Cut the three pieces loose and set the two side pieces aside.
- You can experiment with the width of the middle piece. The wider you leave the middle piece, the more spread out your pleats will be across your arm. If you want a fine detail then make sure the lines are shorter together.
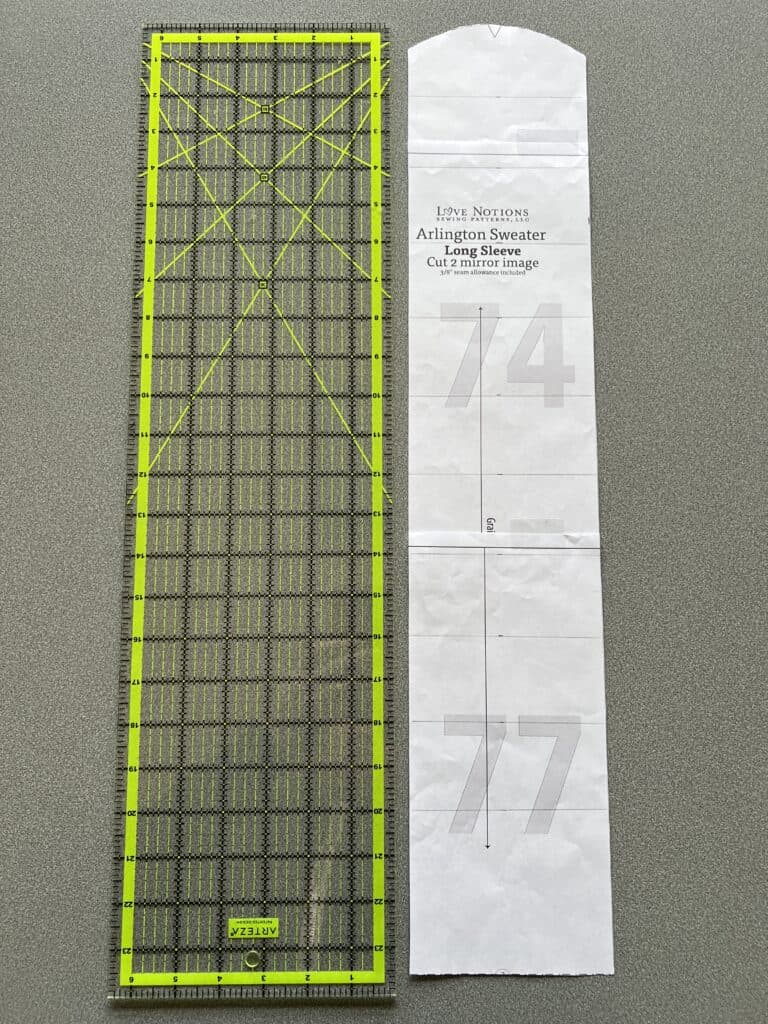
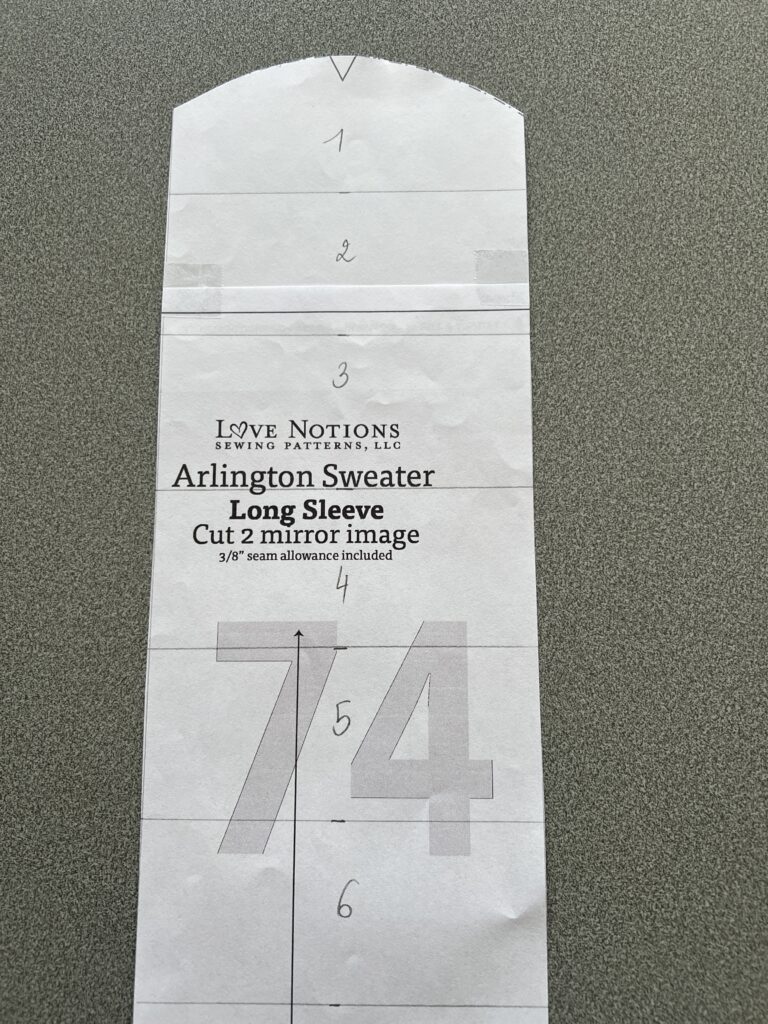
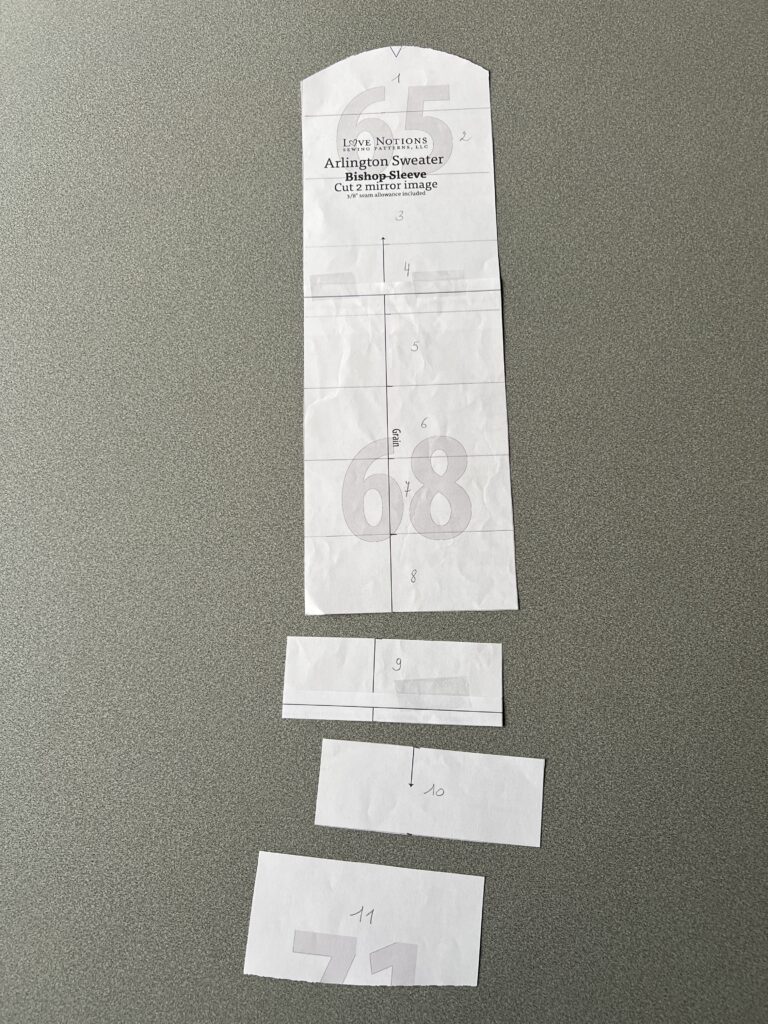
- From the sleeve head, mark 2“ down and draw a horizontal line every 2”.
- Number the parts below so you don’t lose count.
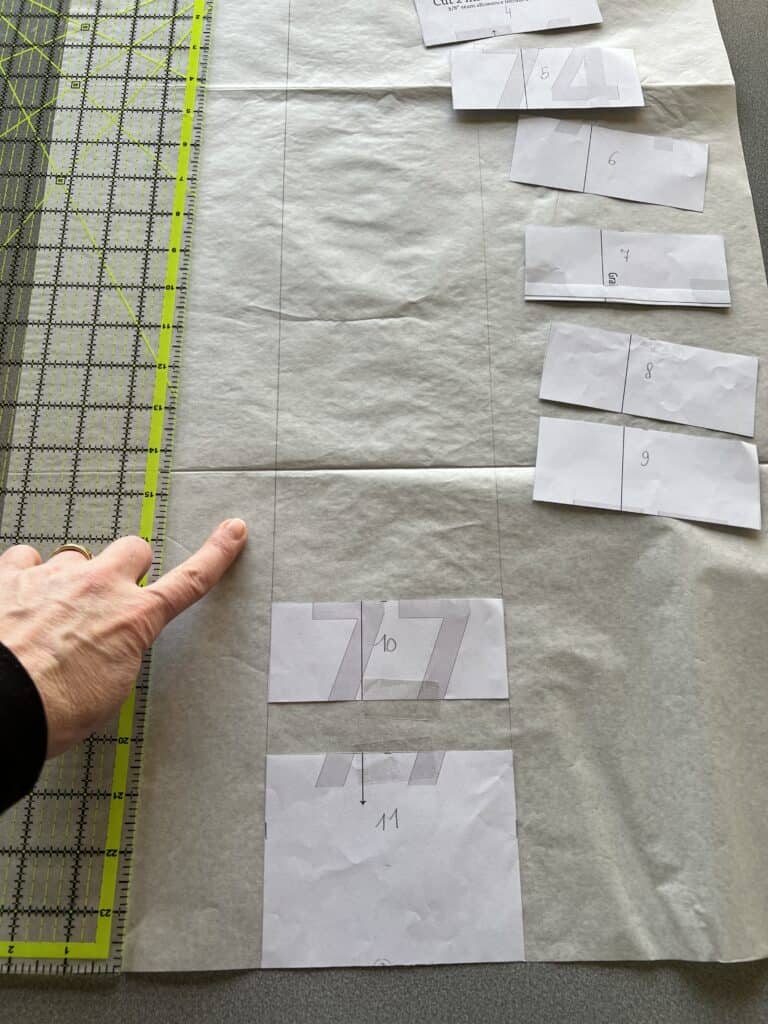
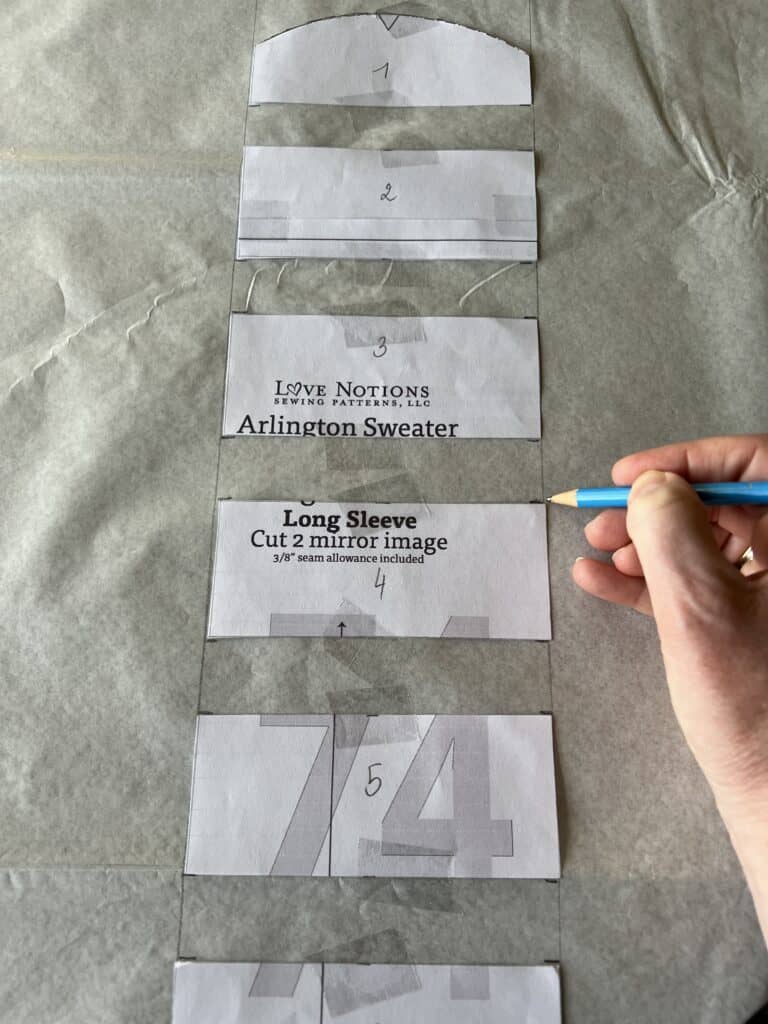
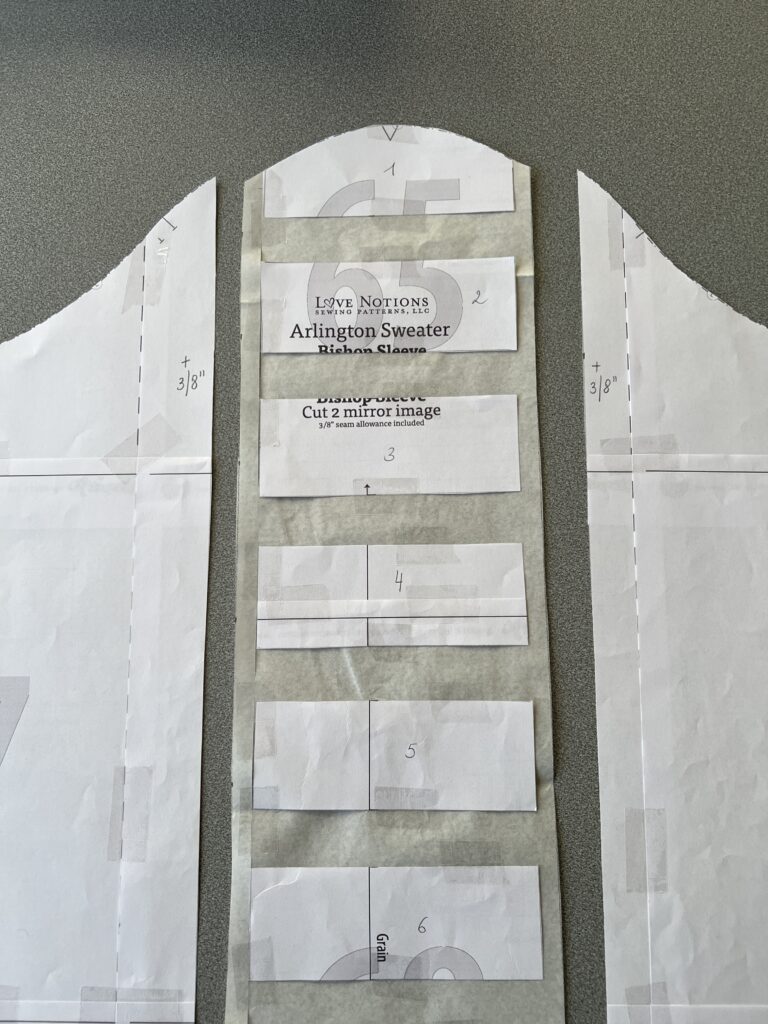
- Take a new piece of pattern paper and tape everything back up at 1 to 2” apart. I used a spacing of 1”.
- To easily position the strips, I drew with pencil two guidelines as wide as one strip. And to make it even easier, I started at the bottom and built my pattern piece this way.
- Your new middle part from your sleeve is almost ready to go.
- Now mark each place on your new pattern piece where you have left spaces in between. You will need these to make your pleats in the next step.
Prepare and Sew your Pleated Sleeve
- You now have three separate pieces that should become 1 sleeve piece again. So draw on both sides of your centerpiece ⅜” seam value and do the same for the side pieces that will come against your centerpiece.
- Now transfer all your pattern pieces to your fabric. I show below how to finish the sleeve, the rest you can continue following the instructions.
- Every indication on my pattern I mark with a needle on my fabric. The idea is that you fold from pin 1 to pin 2, from pin 3 to pin 4 and so on, in the direction of the hem. Towards the bottom.
- If you do the same on the other side, you will get nice pleats and you will see that the middle part of your sleeve, which used to be much longer, is now the same length as the two side parts.
- Secure your pleats within the hem value.
- Complete your sleeve by attaching the two side pieces to your centerpiece.
- Finish your top or dress according to the instructions.
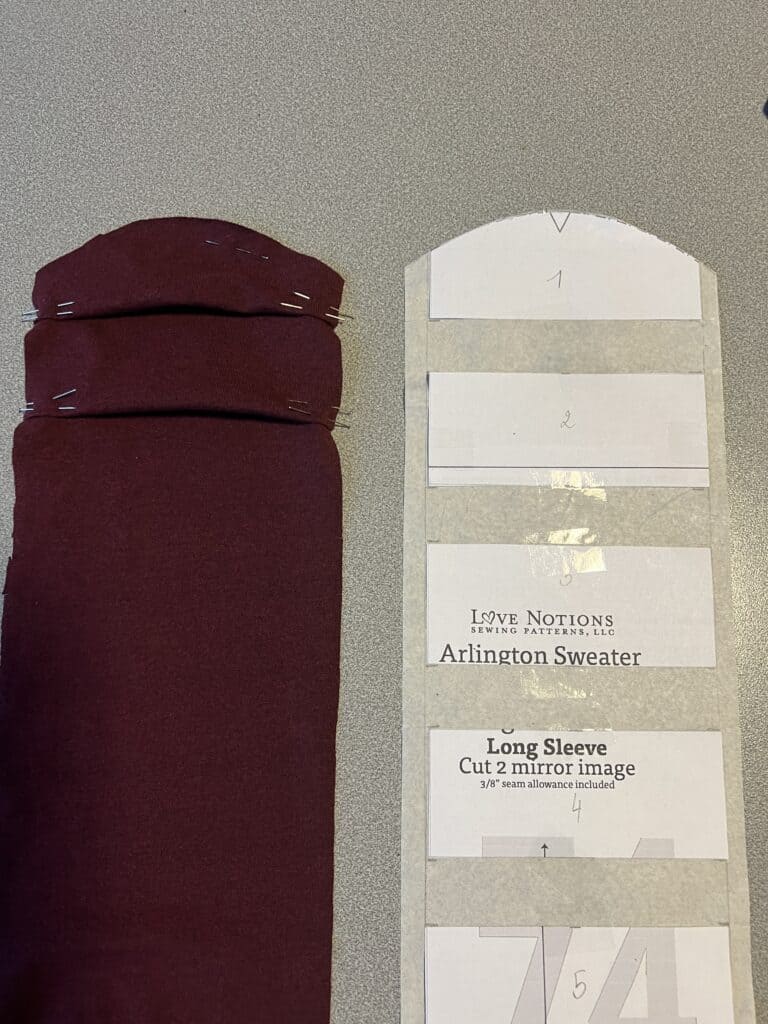

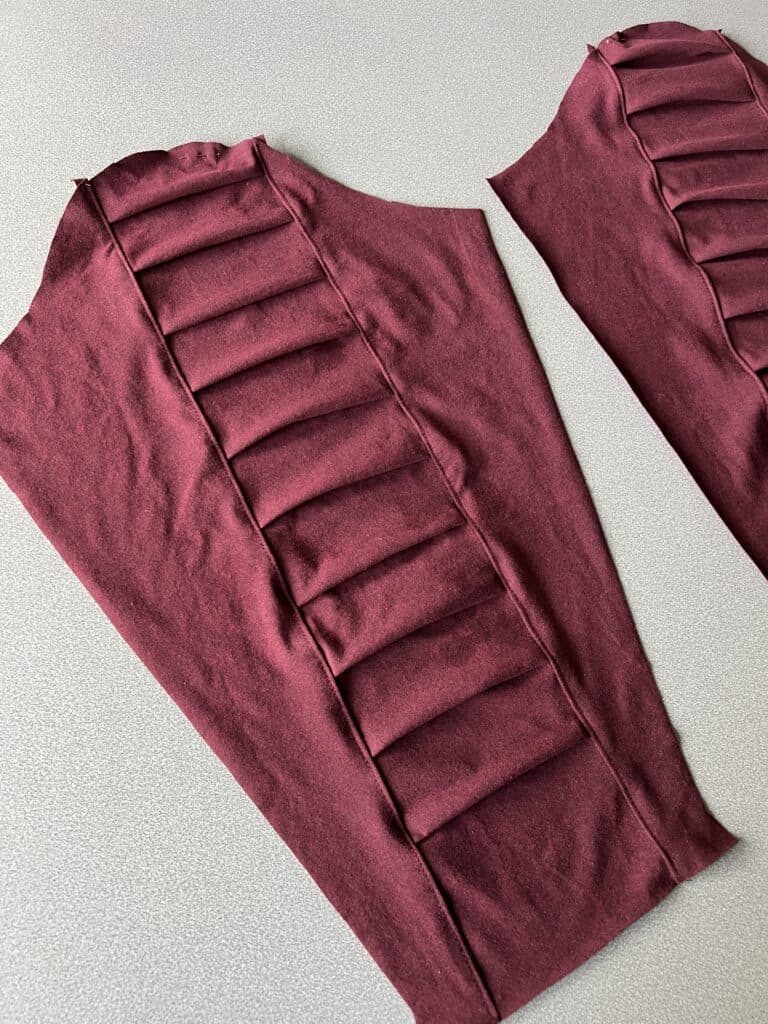
This was actually my first tryout because I wanted to apply this technique to a dress…. I have to admit that the plain fabric I used for the top was actually perfect. You can see the details very well and the pleats are very finely shaped.


Dress with Pleated Sleeves
For the dress, I used the bishop sleeve. I applied the same technique using the same measurements as for the regular sleeve. Below you can see the pattern part divided into the squares every 2“, cut loose and glued back on with 1” in between each time.
For the Arlington dress, I worked with a knit stretch. The fabric itself is thicker and you can see that in the folds formed. I really like the end result with the thick pleats! Besides the special sleeve, I also wanted a longer version so I lengthened the dress by 10”. Since the pattern part at the bottom stays the same in circumference than the hip length I just lengthened at the bottom. I just managed to get this long version with a pleated sleeve out of 3 yards.


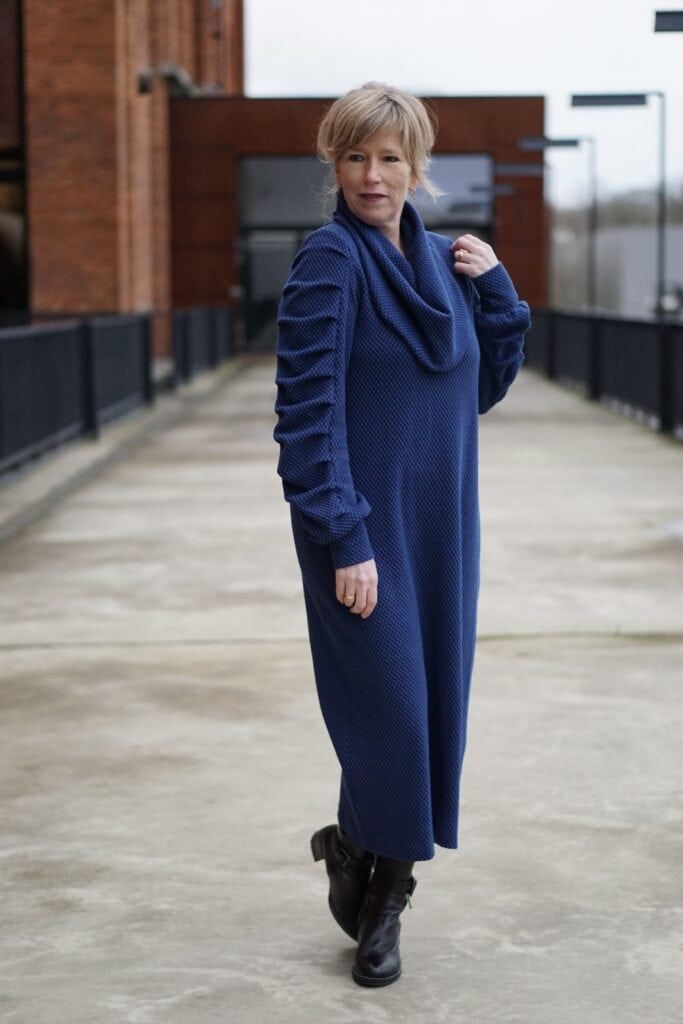

From now on I am two more Arlingtons richer! I will definitely wear the dress during the holidays! If you want to see more pictures, be sure to visit my instagram @sewsewilse . And definitely don’t forget to add your Arlington Sweater pattern to your collection!
Until next time,
Ilse
Save this hack to your sewing Pinterest board.
