Classic Tee Button Sleeve Cuff Hack
There have been so many fun Classic Tee hacks and I’m here to bring you one more! I’m Tami from SewSophieLynn and I’m excited to be here sharing this fun, easy hack today to add a cute button sleeve cuff. I’m a Love Notions junkie and have found my new favorite t-shirt in the Classic Tee pattern. The Classic Tee is a great wardrobe basic but I love that the hacks this week have been anything but boring. This button cuff will add just that extra bit of style to this great pattern.

Button Sleeve Cuff Instructions

First we will need to cut our extra pieces. Measure the bottom hem width of your sleeve piece. Cut two rectangles from your fabric that are 4″ x the width of your sleeve. I did a size small so my pieces are 4″ x 14.5″. You also need two rectangles from your fabric and lightweight interfacing that are 2.5″ x 3.5″. Iron your interfacing to the wrong side of your small rectangles.
Sew up your tee per the tutorial. We will add the cuffs at the very end. Sew it up until you get to the best part- hemming. Adding a cuff gets you out of that dreaded step!
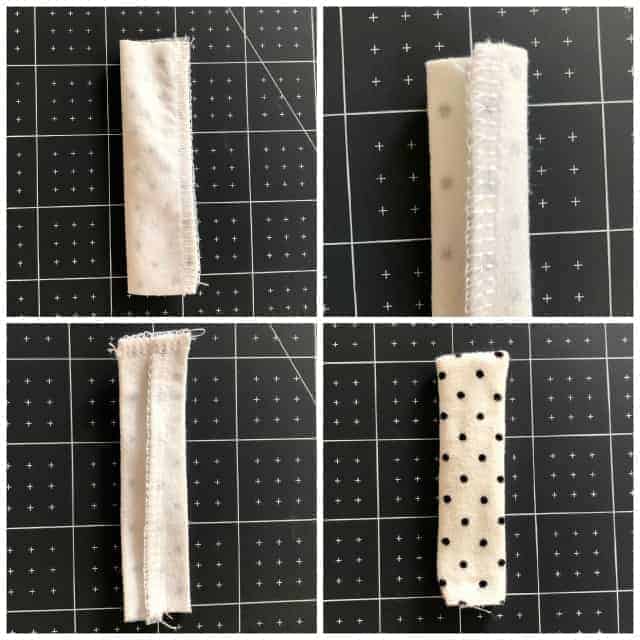
Let’s make the button tab first. We will continue to sew our pieces with a 3/8″ seam allowance. Fold your small rectangle in half widthwise, right sides together. Sew up the long raw edge. Iron your piece so that the seam is in the middle of back. Sew across one short edge. Flip your piece right side out.
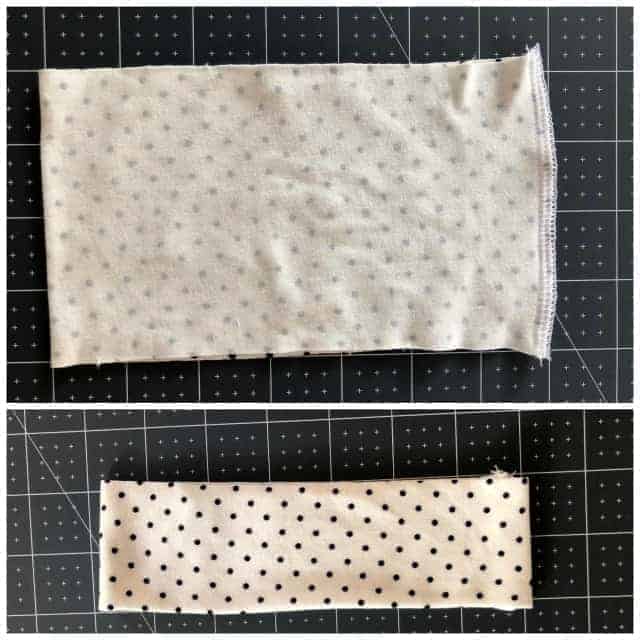
Now we’ll sew the big cuff piece. Sew the short ends of your rectangle, right sides together. Fold your piece in half, wrong sides together. Find the center of your sleeve hem. We will pin/clip the button tab here right side to the wrong side of the sleeve. Now pin your cuff to the wrong side (inside) of the sleeve, matching the seams, and sew. This will put the seam on the outside of the tee and the cuff will hide it when it is turned to the outside. Flip your cuff and button tab to the right side and iron well. Sew your button on the tab and you’re done!


