Lately I’ve seen jeans skirts with a slit in the front in every store and on every web shop. And then it starts to itch for me, because of course I want to make such a skirt myself and what better way to do that than with my favorite pattern: The Glissando.

Want to get in on this fun and easy hack? Let me show you how!
What do you need?
-
-
- Jeans fabric in your favorite color
- Your normal sewing supplies, such as a ruler, a pencil or marker, a curved ruler, your sewing machine and matching thread, … and hopefully you don’t need your seamripper 😉 .
-
Let’s get started…
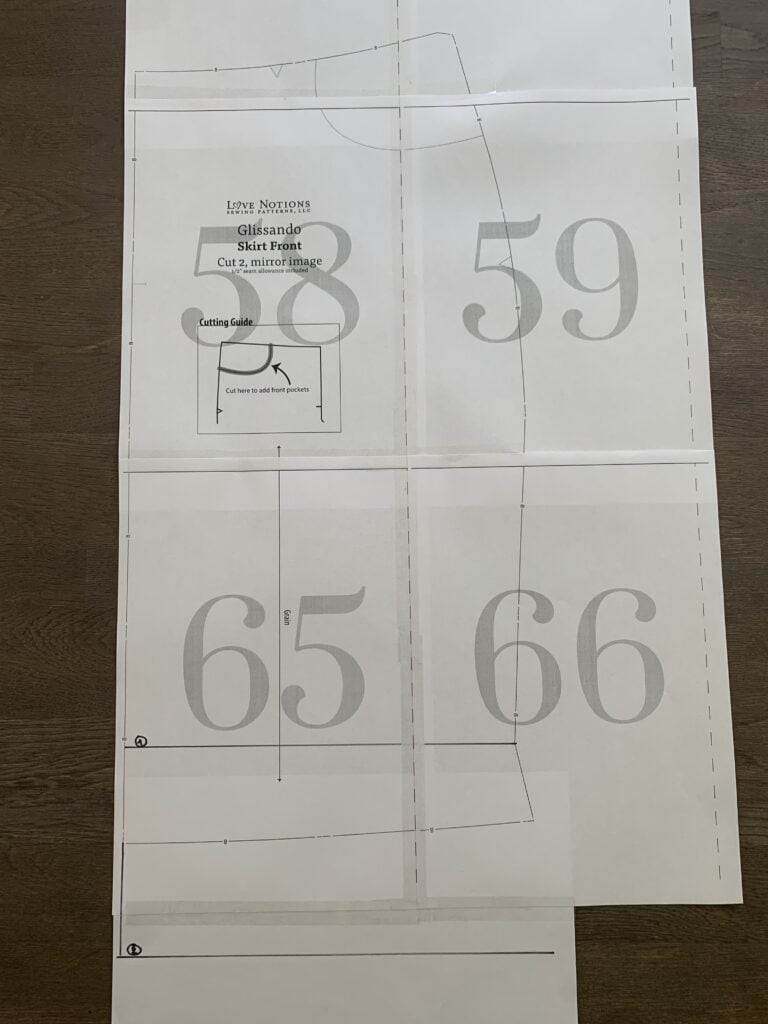
Tape or glue your skirt pattern as usual.
PATTERN ADJUSTMENTS for a Front Slit
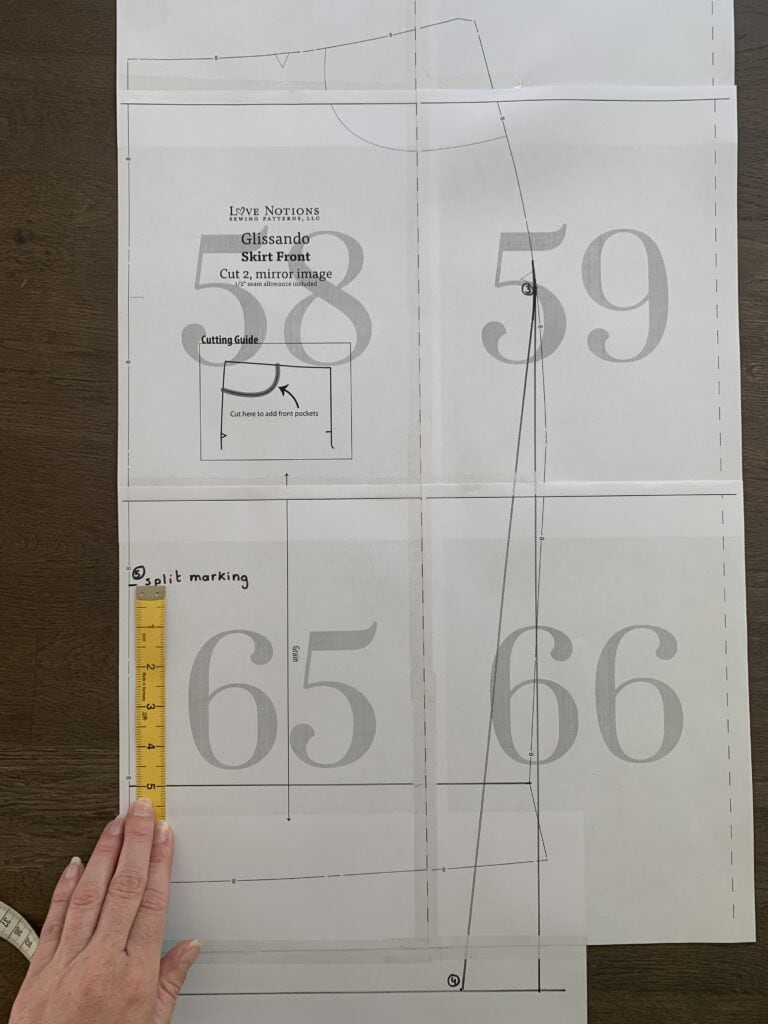
STEPS 1 & 2: Draw a line perpendicular to the center front. The line removes the 2″ or 5 cm hem allowance (1). I want to make my Glissando a little longer. If you also want a skirt below your knee like I did, or even a longer skirt, now is the time to lengthen. I choose to add 6″ or 15 cm to the center front line. Then I draw a transverse line, perpendicular to the middle front. This will be the new bottom of the skirt (2).
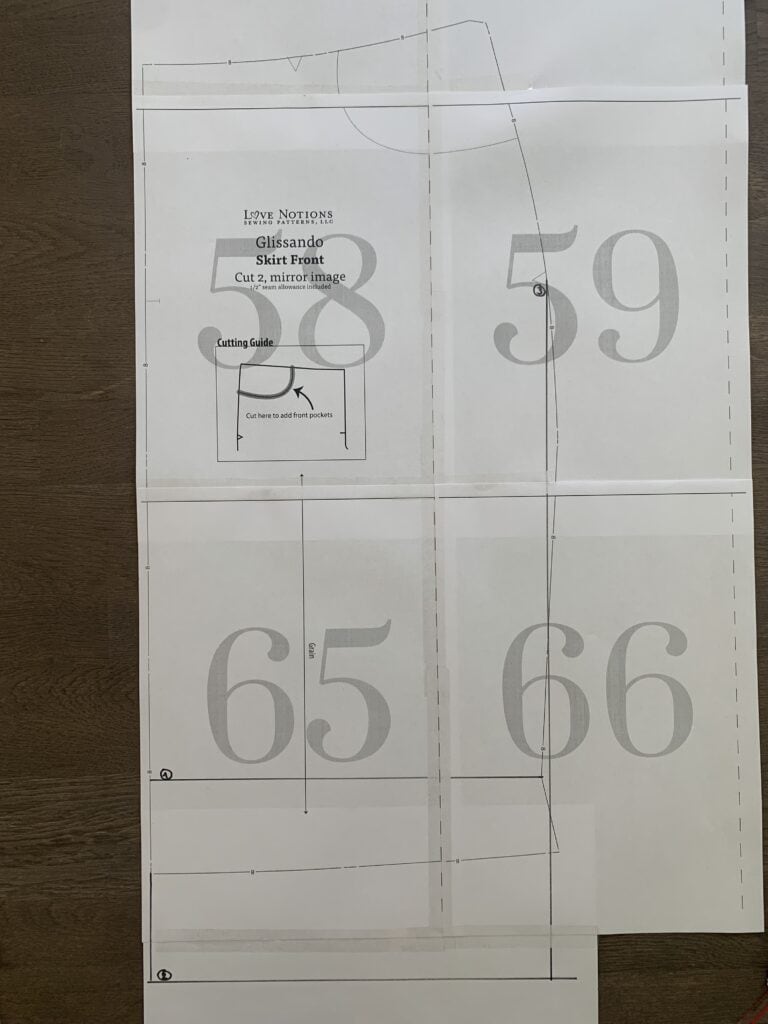
STEP 3: Because I want the slit to fall open a bit, I want to make the bottom of my skirt a little narrower than the original bottom. You do this by drawing a straight line from the hip downwards, perpendicular to your skirt edge (3). The hip is indicated by a triangle.
STEP 4: Now draw a point 2″ or 5 cm inwards on the skirt edge (4). Connect the triangle of the hip to that point (4). Make your new hip line a little rounder with a curved ruler.
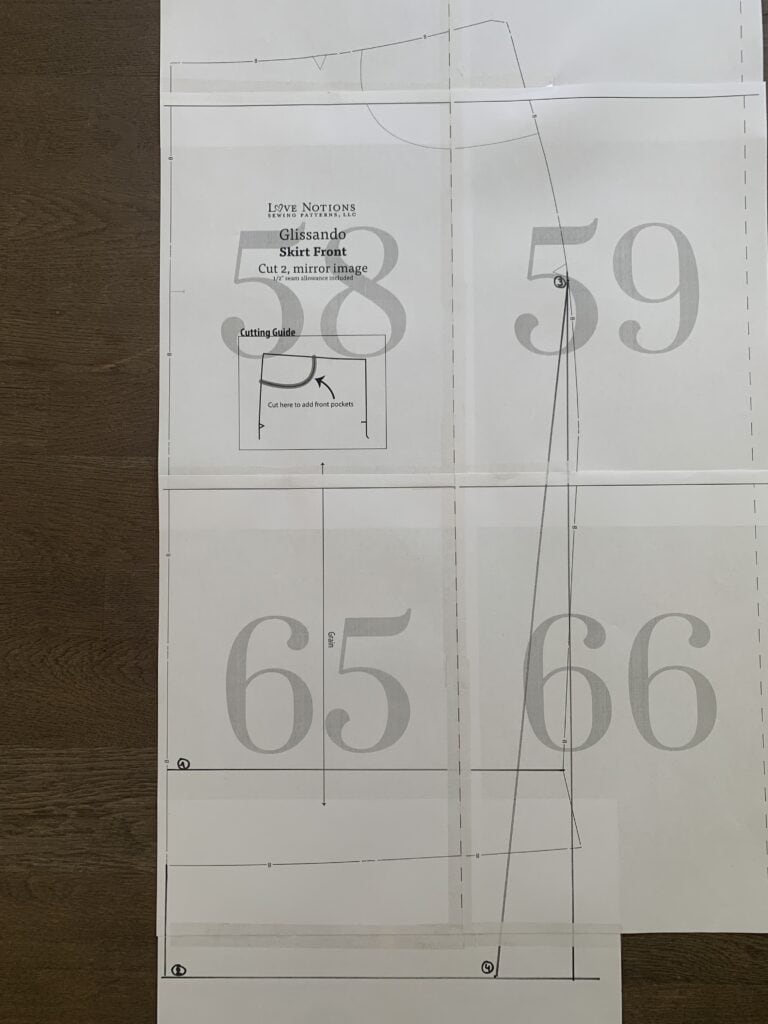
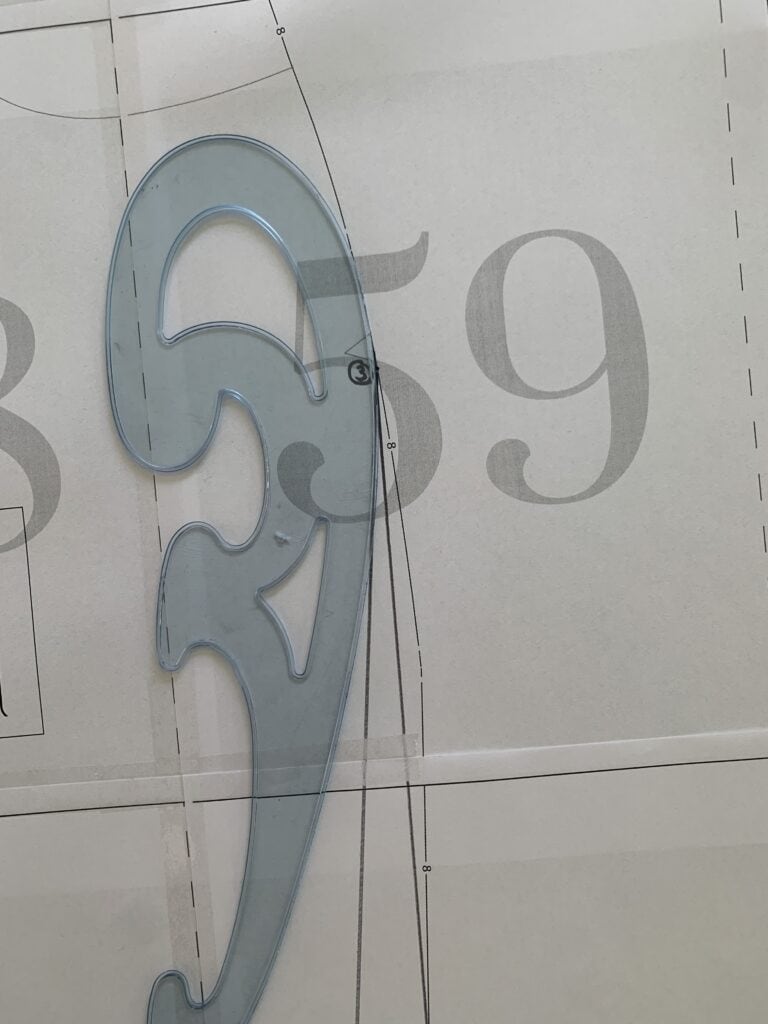
STEP 5: We are now going to draw the slit in the middle front. I want my slit to be 5″ or 10 cm above my knee, so I mark a point 5″ or 10 cm above line 1 (5).
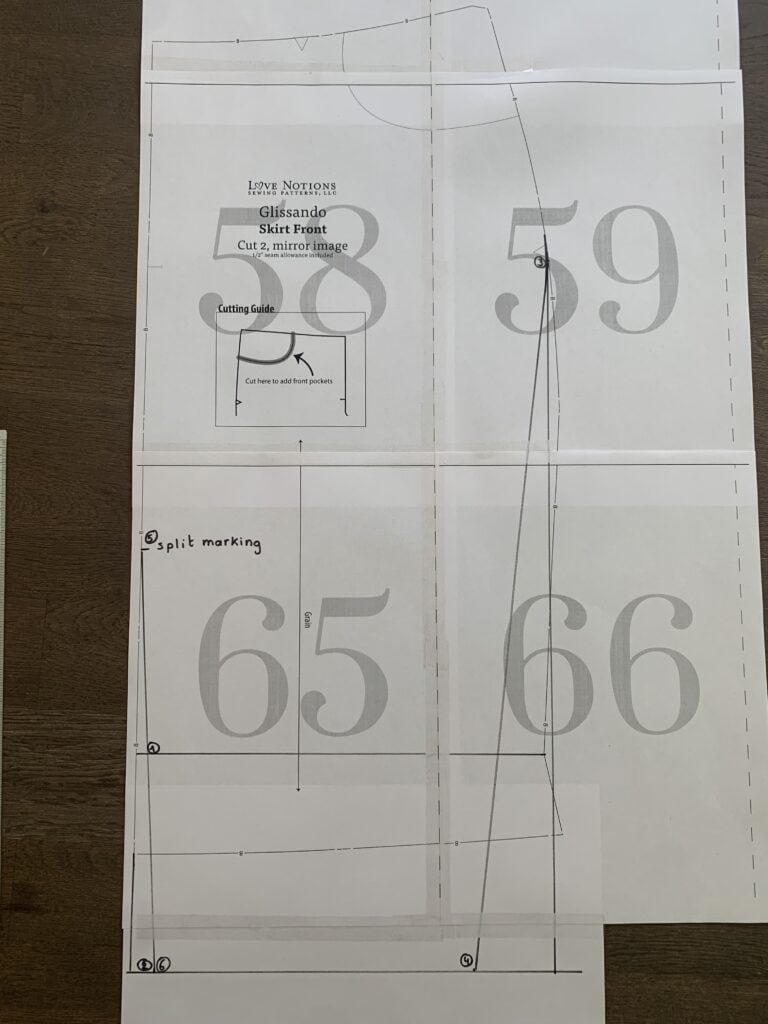
STEP 6: To make the slit even a little more open, I also remove 0.5″ or 1.2 cm in the middle front (6). Connect the mark for the slit (5) to point 6.
STEP 7: Now we only need to add the hem allowance . Therefore, fold your pattern at the bottom edge of the skirt to the back and then cut out your pattern piece. Unfold the paper and draw your hem allowance of 2″ or 5 cm at the bottom edge of your skirt. Cut on this seam allowance line.
Your new front pattern piece is ready.
2. Lengthen desired amount by adding to to center line then draw a transverse line, perpendicular to the middle front.
(optional)

Unfold the paper and draw your hem allowance of 2″ or 5 cm at the bottom edge of your skirt. Cut on this seam allowance line.

Your new pattern pieces are all set! You can start sewing now!
SEWING the Front Slit
Follow the sewing instructions for the skirt until you reach step 1 on P12. Here you need a few extra steps to finish your front slit.
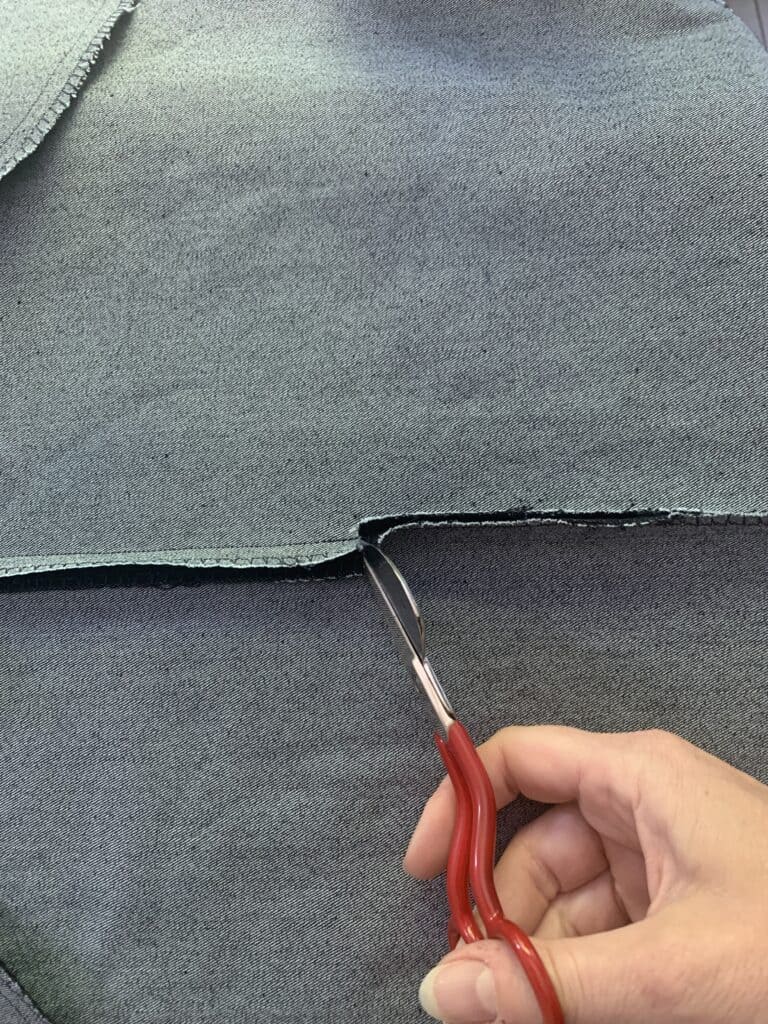
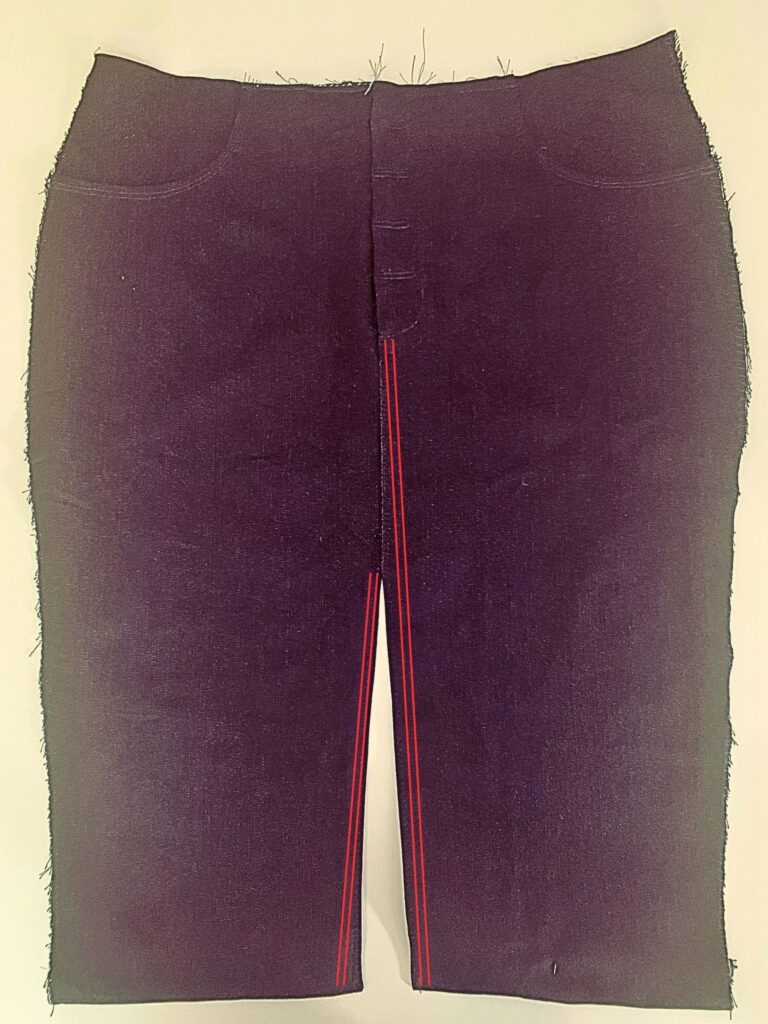
STEP 1: Align the skirt fronts, RST. Stitch the center front seam directly below the fly until you reach the slit marking.
STEP 2: Clip into the seam allowance right below this stitching, be sure not to go past the stitch line.
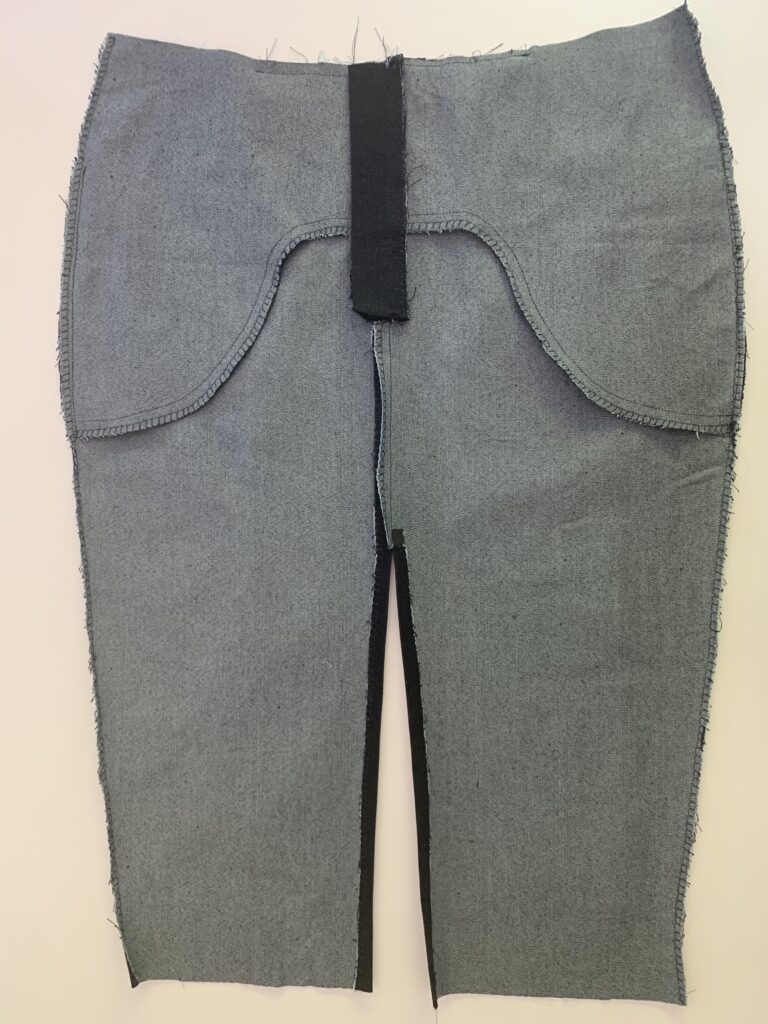
STEP 3: Fold and press the seam allowance from the slit ½“ to the wrong side.
STEP 4: Topstitch the seam allowance at the center front (step 2). Continue your topstitching along the left side of your slit. Next, topstitch the right side of your slit. The seam allowance on both sides of the slit are now neatly finished.
Now, you can proceed to step 3 at P12.

All done? Give yourself a pat on the back. You will be all dressed according to the latest fashion!


Your Turn to Try a FRONT SLIT!
I hope you enjoyed this Glissando Hack. Don’t have the pattern of the Glissando pants, shorts & skirt yet? Be sure to buy it today while it’s available for only 5$! You can find it here!
I hope to see you soon at Flaxfield Sewing, here you will also find additional pictures of my new (and old) Glissando!
Xxx
Annick
[/vc_column_text][/vc_column][/vc_row]

