Lotus Blossom Sew Along: Day Three
Day three of the Lotus Blossom Sew Along and that means, hem day! Today I’m going to share some tips for getting a great curved hem. We will also be pressing the neckline and preparing it for tomorrow’s adventure, the twist! Turn on your sewing machines, and grab your cut out fabric, it’s time to hem!
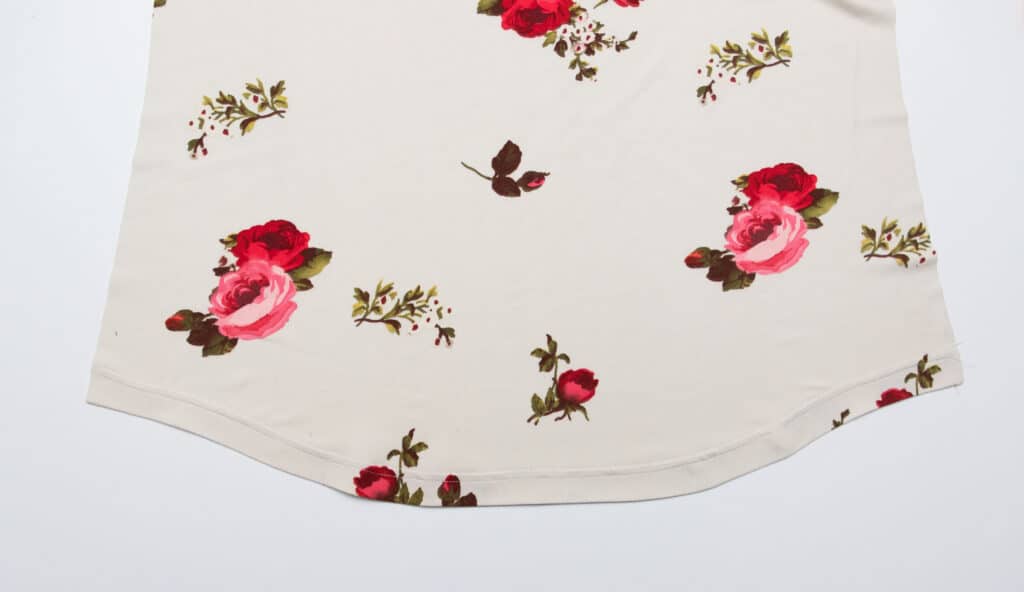
Curved hems are gorgeous! But, they can be a little tricky to sew. I have a very simple trick that makes pressing a curved hem so easy! The basting stitch.
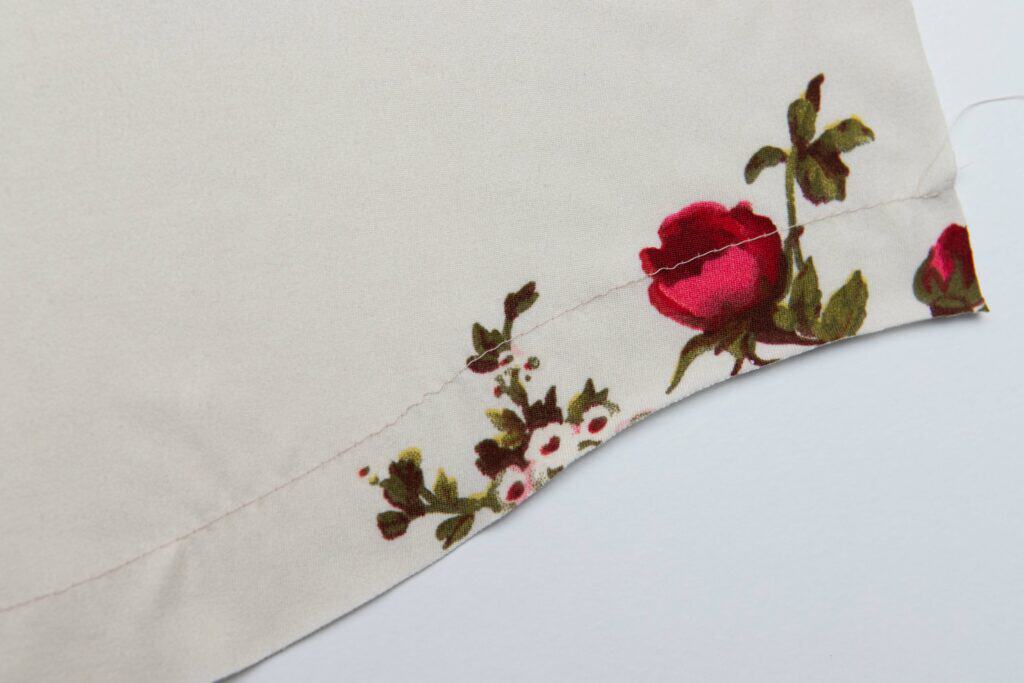
You read that correctly. A basting stitch. Sew a basting stitch marking where to turn up your hem. We are doing a 1″ hem, so using a 1″ seam allowance, I sewed a long straight stitch along the bottom hem of the shirt back. Don’t backstitch at the beginning or end! This gives us a very easy line to follow while we press our hem up into place. No more struggling to press the hem up evenly on the curves!
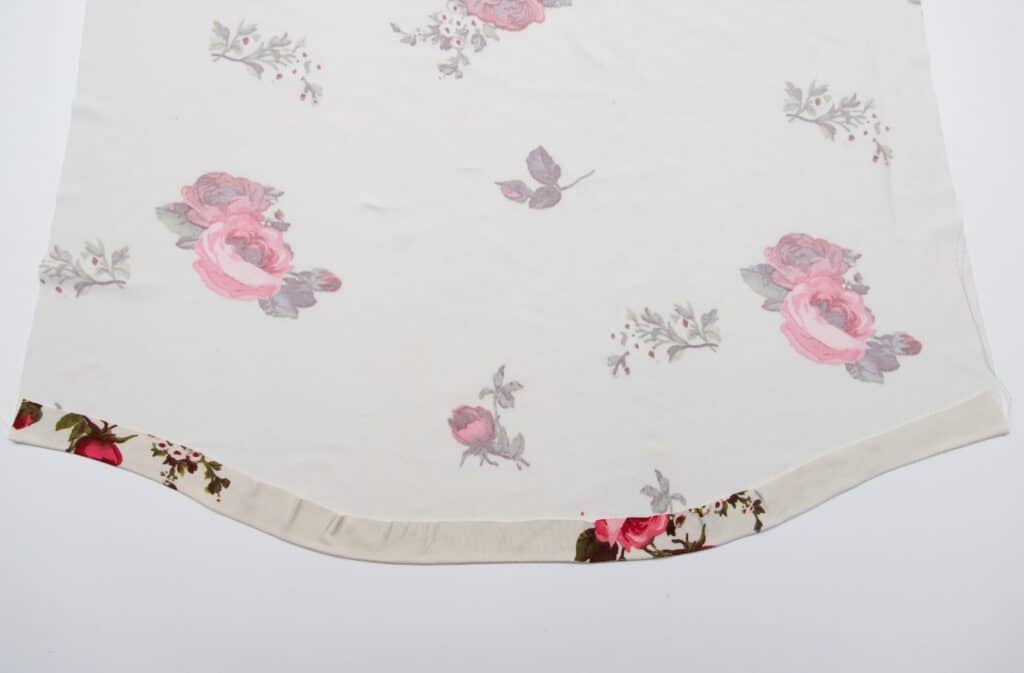
Fold the hem under to the wrong side right along the stitch line and press into place. You may have some places where the fabric folds over on it’s self. That’s okay! It happens because the cut edge is longer than the inside of the shirt where it rests. Just try to space the pleats evenly, if possible. While pressing, you can also slip some hem tape under the hem to keep it in place as you topstitch.
Now topstitch the hem in place with either a straight stitch, narrow zig zag stitch, double needle, or a coverstitch machine. If you use a straight stitch, you will need a longer stitch, about a 4 if a 5 is the longest length on your machine. If you use a shorter stitch, you run the risk of the hem breaking.
Isn’t that a gorgeously even hem! After the hem is sewn in place, just pull the basting stitches that marked the fold line out.

Now let’s prepare our neckline.
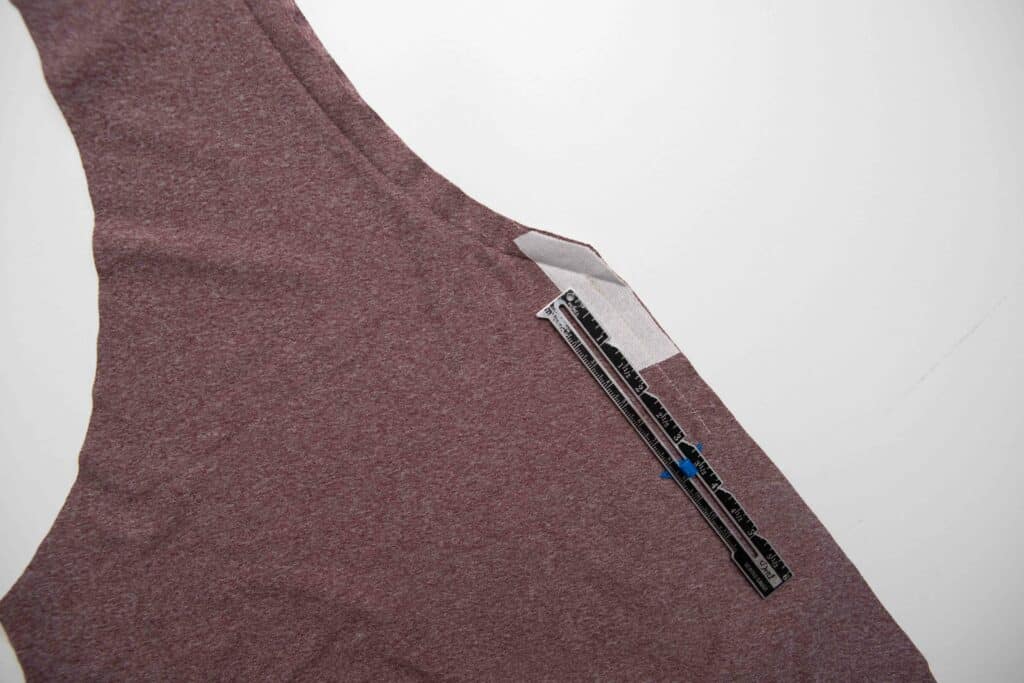
We will be pressing the neckline under 1/2″. Before we do that, we need to stabilize the bottom V of the neckline. Do this by pressing some light weight interfacing at the bottom of the neckline. I like a scrap of SF101 that is about 2″ long and 1/2″ wide. Press it at the top of the center seam. (I’m sorry for the jump in fabrics! The interfacing didn’t show well on the light fabric. Ignore that ruler. I’ll explain that on Friday.)
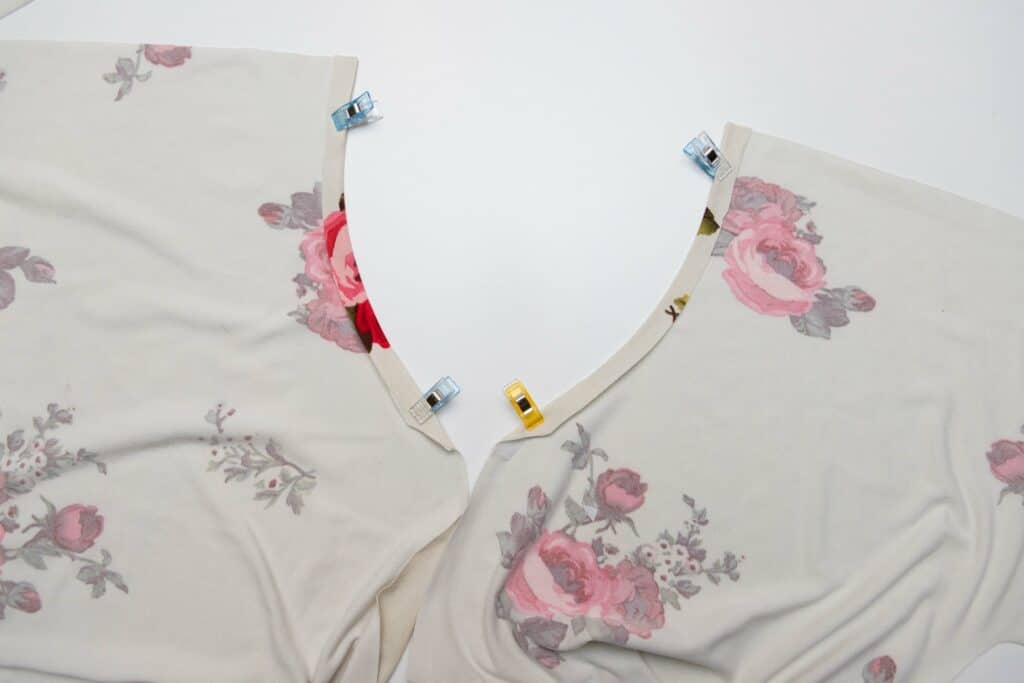
After the interfacing is applied, press the hem under 1/2″. Be sure to do this on both sides of the neckline. We aren’t sewing the neckline yet, only pressing. After this step, you are all done for today! Read on though for an easy hack!
How to make a Lotus Blossom a tank or add long sleeves!
In our Facebook Support Group, one of our awesome members asked if I could share how to make the Lotus Blossom into a tank. That request was followed with requests to add longer sleeves. Well, wouldn’t you know that it’s the same technique for both!!
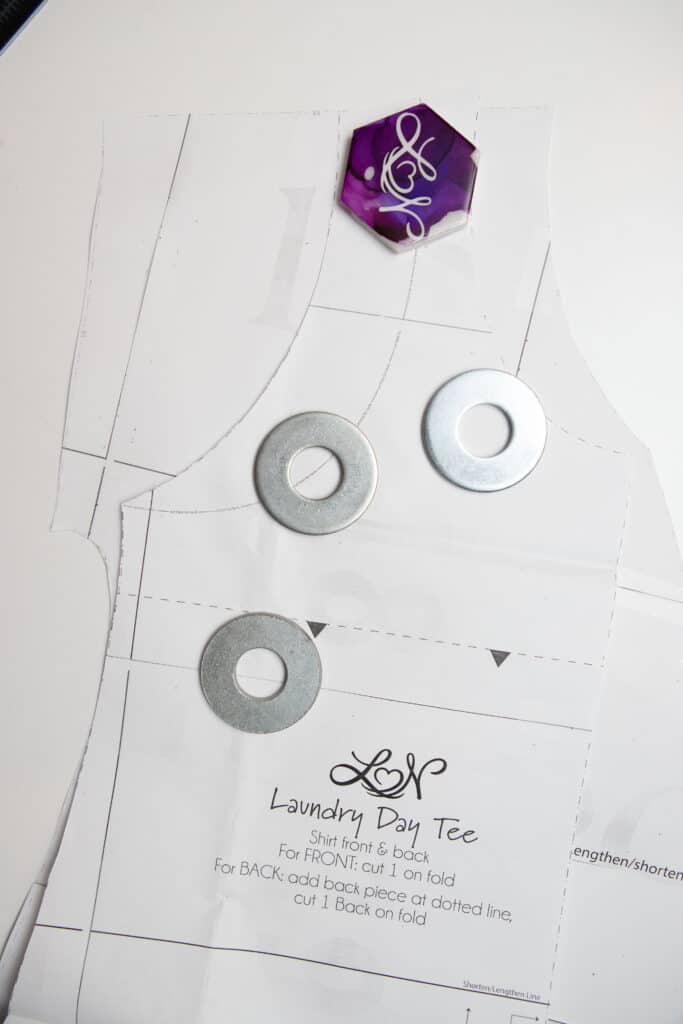
You are going to need to borrow a pattern that has a traditional set in sleeve. I am using the Laundry Day Tee. If you are a member of our Facebook group, you can find a code in the announcements to get it for free!
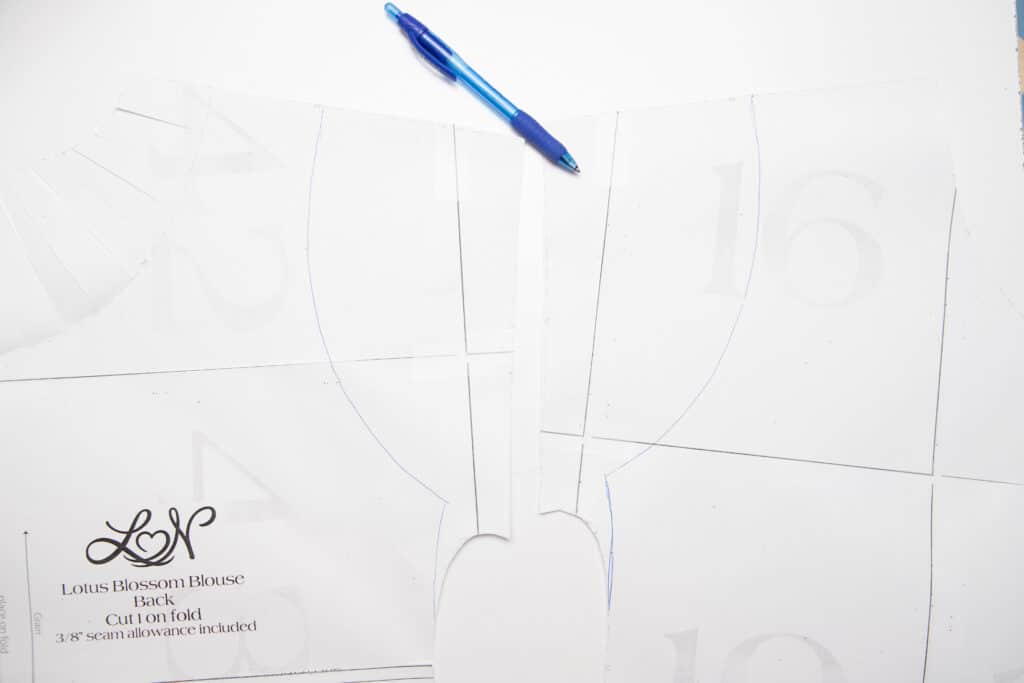
We are going to take the armscye (the place where the sleeve attaches) from the borrowed pattern and trace it onto the Lotus Blossom. Place the borrowed pattern on top of the Lotus Blossom . Line up the outside edge of the shoulder seam and the side seam.
Trace the armscye onto the Lotus Blossom . You can see where I traced it in the photo below. Do this for the front and the back. You will need to trace both ends of the front piece. I used the sleeve line on the LDT for the tank I sewed.
Cut out your pattern on your new armscye! If you want to add sleeves, you will need to also borrow the sleeves from the other pattern. After you sew the shoulder seams of the Lotus Blossom , attach the sleeves like you would in the borrowed pattern. After the sleeves are in, you would sew the side seam and bottom seam of the sleeve.
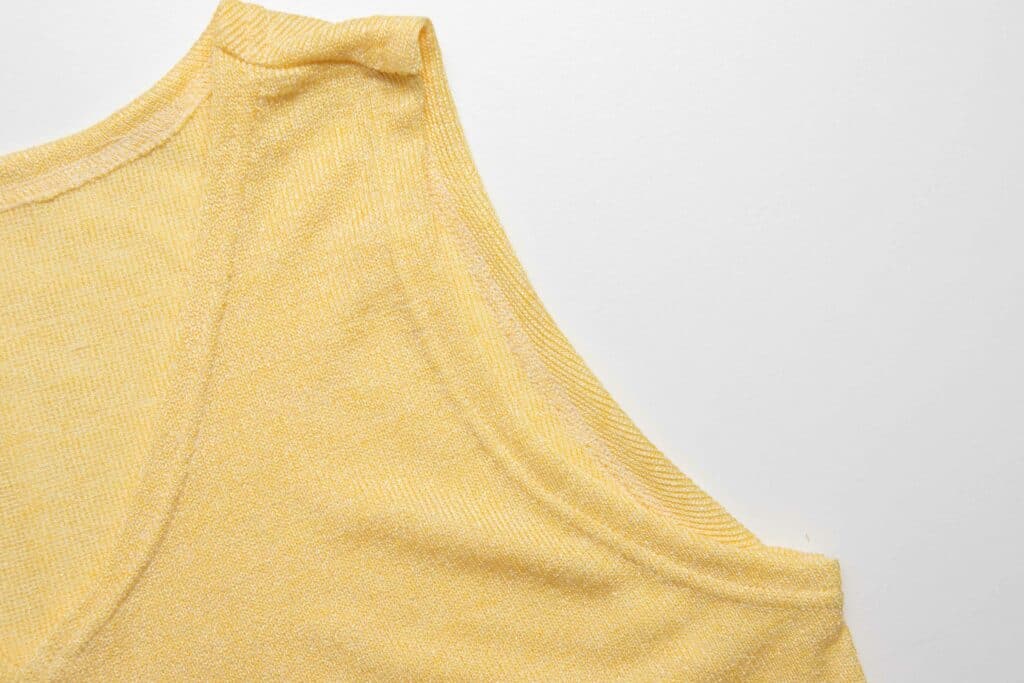
If you want a sleeveless Lotus Blossom , fold the armscye under 1/2″ and press. Then topstitch in place. You could do bindings, if you prefer, but I didn’t want to weigh down this light weight sweater knit.
It’s more fun to sew with friends! Join us in our Facebook Support Group and share pictures of your progress, ask questions, and cheer on others as we all sew the Lotus Blossom together!
If you are just joining us, you can still catch up!
Day One: Printing, fabric, cutting
Day Two: Lace inset or applique
Day Three: Hemming and preparing the neckline


