[vc_row type=”in_container” full_screen_row_position=”middle” column_margin=”default” column_direction=”default” column_direction_tablet=”default” column_direction_phone=”default” scene_position=”center” text_color=”dark” text_align=”left” row_border_radius=”none” row_border_radius_applies=”bg” overflow=”visible” overlay_strength=”0.3″ gradient_direction=”left_to_right” shape_divider_position=”bottom” bg_image_animation=”none”][vc_column column_padding=”no-extra-padding” column_padding_tablet=”inherit” column_padding_phone=”inherit” column_padding_position=”all” column_element_direction_desktop=”default” column_element_spacing=”default” desktop_text_alignment=”default” tablet_text_alignment=”default” phone_text_alignment=”default” background_color_opacity=”1″ background_hover_color_opacity=”1″ column_backdrop_filter=”none” column_shadow=”none” column_border_radius=”none” column_link_target=”_self” column_position=”default” gradient_direction=”left_to_right” overlay_strength=”0.3″ width=”1/1″ tablet_width_inherit=”default” animation_type=”default” bg_image_animation=”none” border_type=”simple” column_border_width=”none” column_border_style=”solid”][vc_column_text]Today on the blog, Michele from winmichele.com shows two ways to get the most out of your Harmony top with some beautiful, eye-catching details. Read Michele’s in-depth tutorial to create shoulder tucks and see her demo for adding on a petal sleeve. In fact, Tami loved Michele’s petal sleeve idea so much she drafted a FREE add-on pattern piece specifically for the Harmony blouse!
Grab your Harmony blouse and try out the shoulder tucks with the FREE petal sleeve add-on! <3
Tami here! I saw Michele’s ideas about the petal sleeve and liked them so much that I drafted a FREE petal sleeve option as an add-on specifically for the Harmony Blouse! Click on the pdf link below and you will find the Harmony Petal Sleeve tutorial and pattern piece. Just print your selected size(s) in the layers option for Acrobat Reader and follow the directions on the pdf. I love the petal sleeve style and with Michele’s tutorial you can see how to add it to many other short sleeved patterns. I can’t wait to make a Harmony with the shoulder tucks! Enjoy! <3

Harmony Blouse: Shoulder Tucks & Petal Sleeves
When it comes to shopping for patterns, I look for OPTIONS: little details like shoulder tucks or petal sleeves are so enticing to me, as are the basics like multiple lengths, lots of versions, different views and lots of sleeves. This way I can get tons of individual garments from just one pattern. Hi! I’m Michele from WinMichele and I’m so excited to guest post for Love Notions today.
Shopping for patterns is something I think every sewist enjoys doing, right? You start by shopping for that specific style you are looking for. Then you think of ways of styling that garment. The more ways you can style it the better. As I said earlier, what gets me more excited is when I see a pattern that offers several options or versions of their patterns. Different views displaying possibilities. The wheels in my head start to turn and I can start imagining which look I would want to sew. Love Notions is well-known for the variety of options offered in each of their patterns. In many cases, there’s no need to modify when all the work is done for you.
The Harmony Blouse: Classic and Easy
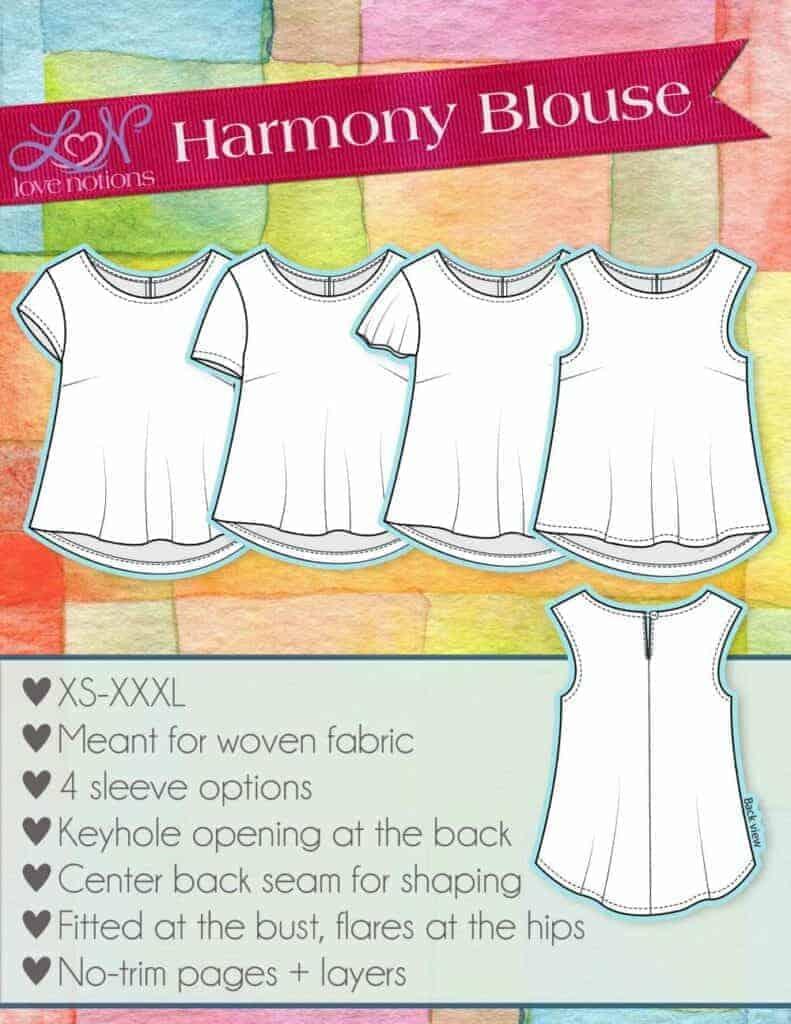
I chose the Harmony Blouse pattern to add to my wardrobe. This is a woven top that is classic in style and is easy to sew. This top is designed to be fitted around the bust and flared around the waist/hip area. The center back seam helps give this top some shape while the drape of the lightweight woven fabric help skim over our bodies. You get three sleeve options with this pattern along with a sleeveless version. Don’t get me started on the two bust options for the bodice. That’s incredible!
I’m a student at my local college studying pattern drafting, so I thought if someone were to have this pattern, what are a few ways they can change it to make a new look? Let us add a little detail to the already great pattern.
Harmony Blouse with Petal Sleeves
Here is a quick tutorial to make your very own petal sleeve using most any short sleeve pattern piece!
Create the Petal Sleeve
We need to create the overlapping panels of the petal sleeves by tracing them off the existing short sleeve pattern.
Figure 1
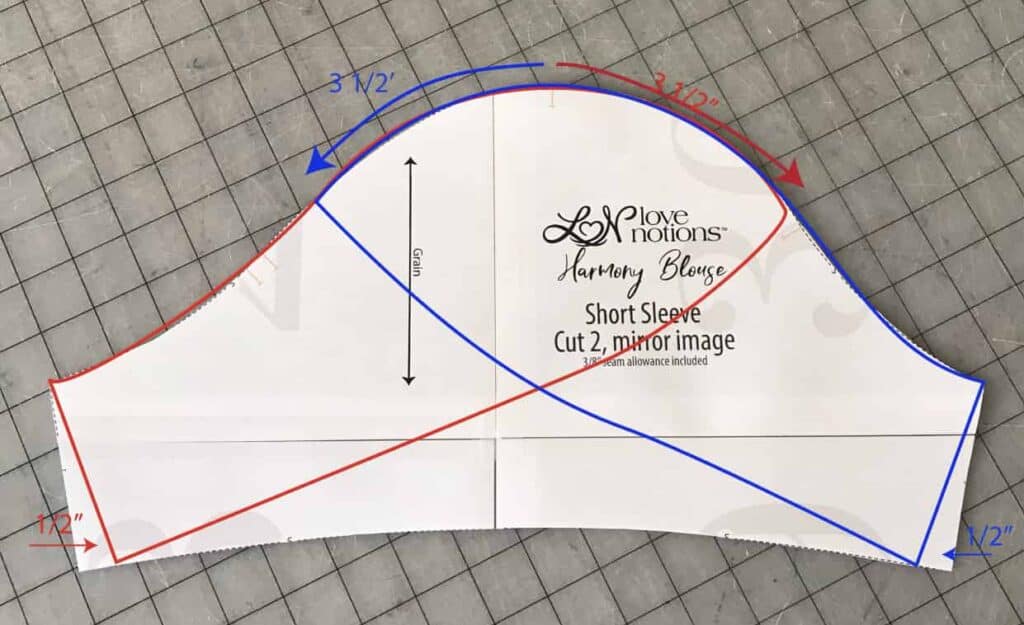
- Seen in Red, trace the BACK panel of the petal sleeve. 3 1/2’ from shoulder notch down the front sleeve cap. Reduce the width of the sleeve by 1/2” from side seam. Make sure to mark notches and label back. (Figure 1)
- Repeat step one for the FRONT panel of petal sleeve shown in Blue. Mark the notches and label front. (Figure 1)
- Now cut out both panels of the sleeve and join them at the side seam. You will have an All-IN-ONE petal sleeve pattern. (Figure 2)
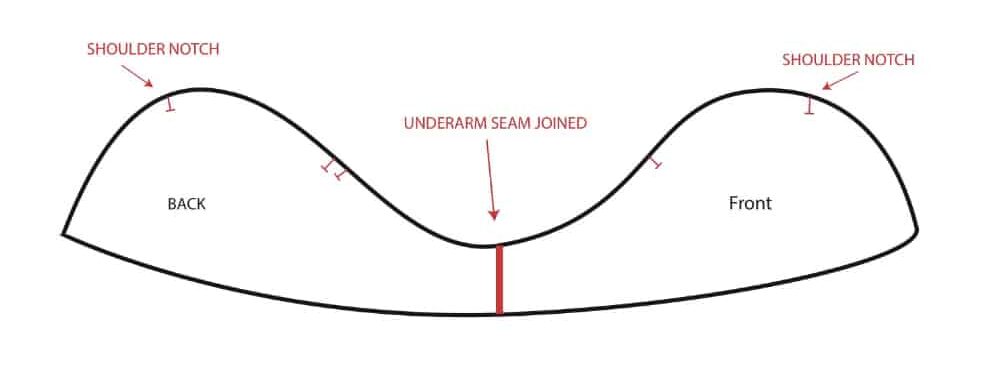
Figure 2
Petal Sleeve Construction
Baste the sleeve in the round, along the sleeve cap making sure both shoulder notches match. Insert sleeve to bodice matching notches and sew.


Now, onto another pattern detail!
Like I said, I’m a pattern drafting student, and one of the first things you learn is dart manipulation. This simple task can change the look of a garment instantly.
Shoulder Tucks
I found it! A little detail that will catch some people’s eye to admire. Tucks at the shoulder! Simple tucks around the shoulder that will give room for the bust yet give detail to the garment for some flare. So let me show you how I did it.

**Make sure you have already made a muslin of the top and fixed any fit issues. This pattern modification should only be done after the muslin has been assessed.
I have chosen the sleeved bodice pattern piece to alter, even though I will be wearing it sleeveless. I do like a little more coverage around the shoulder. You can still do this modification on the sleeveless bodice pattern piece if you wish. (I also advise using pencil to mark your patterns, sharpie pens were used in this tutorial only for visibility.)
Shoulder Tucks Step 1:
Take your front bodice piece and draw out all the seam allowances on the pattern. This is an important step because you need to know exactly where the original pattern is.
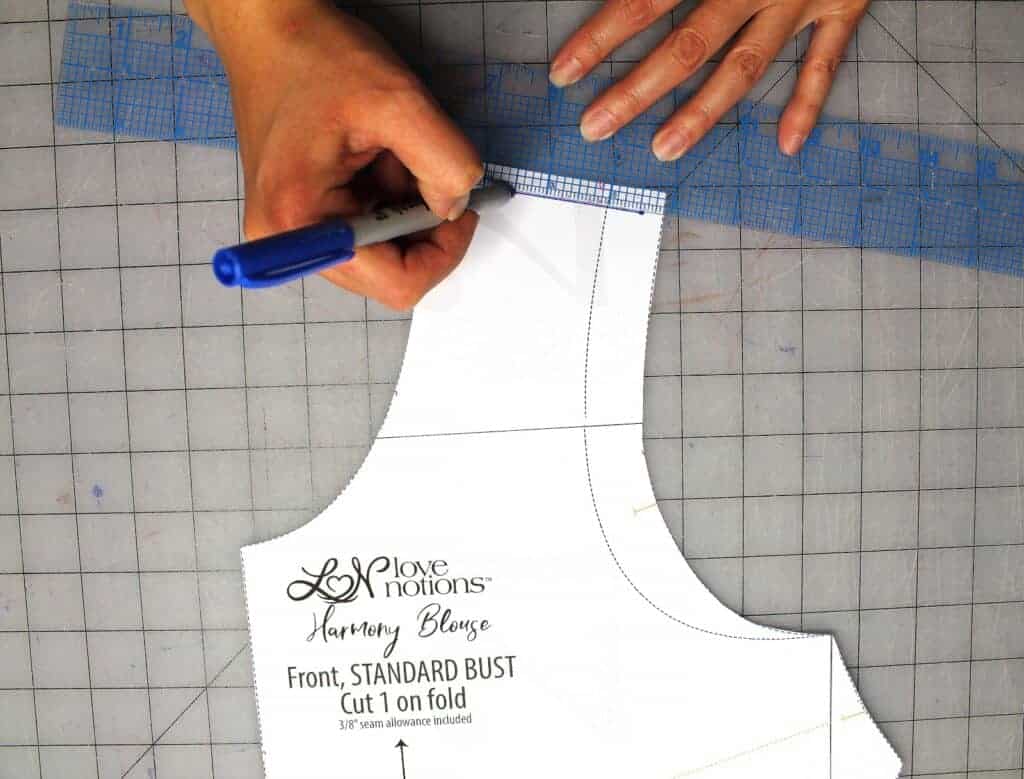
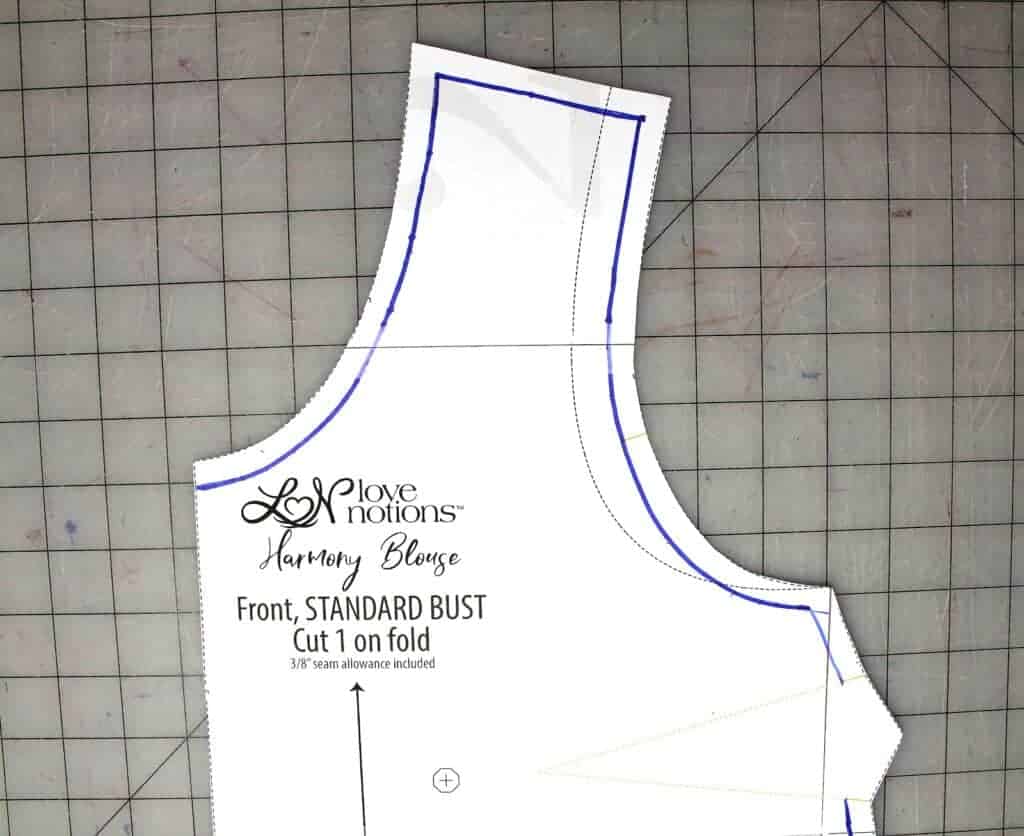
Shoulder Tucks Step 2:
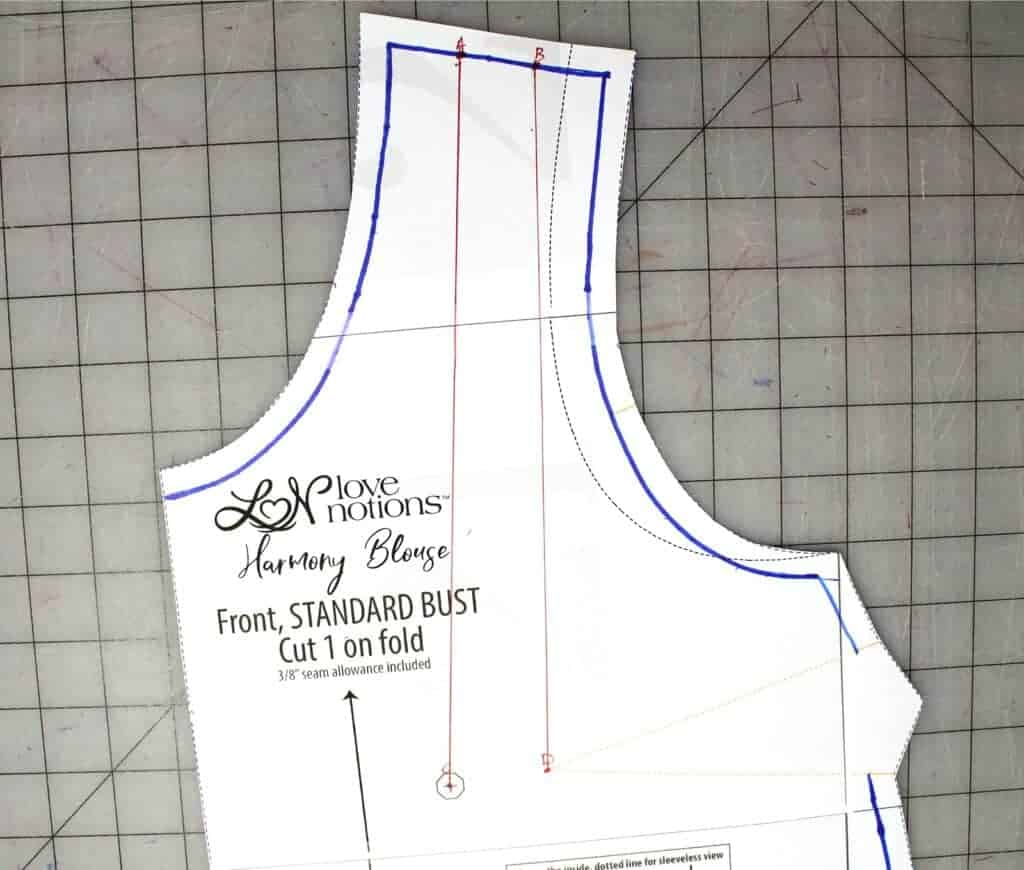
Along the shoulder line, make two dots equal distance from each other. (I made mine 1″ each apart.) Label the First dot “A” and the second “B“.
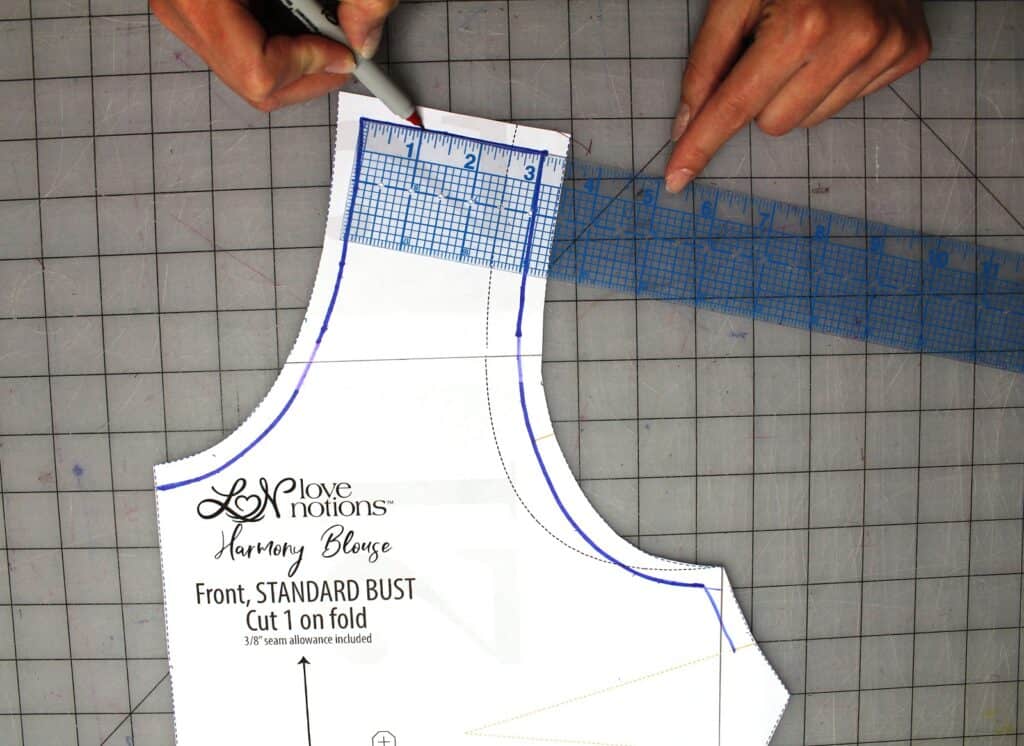
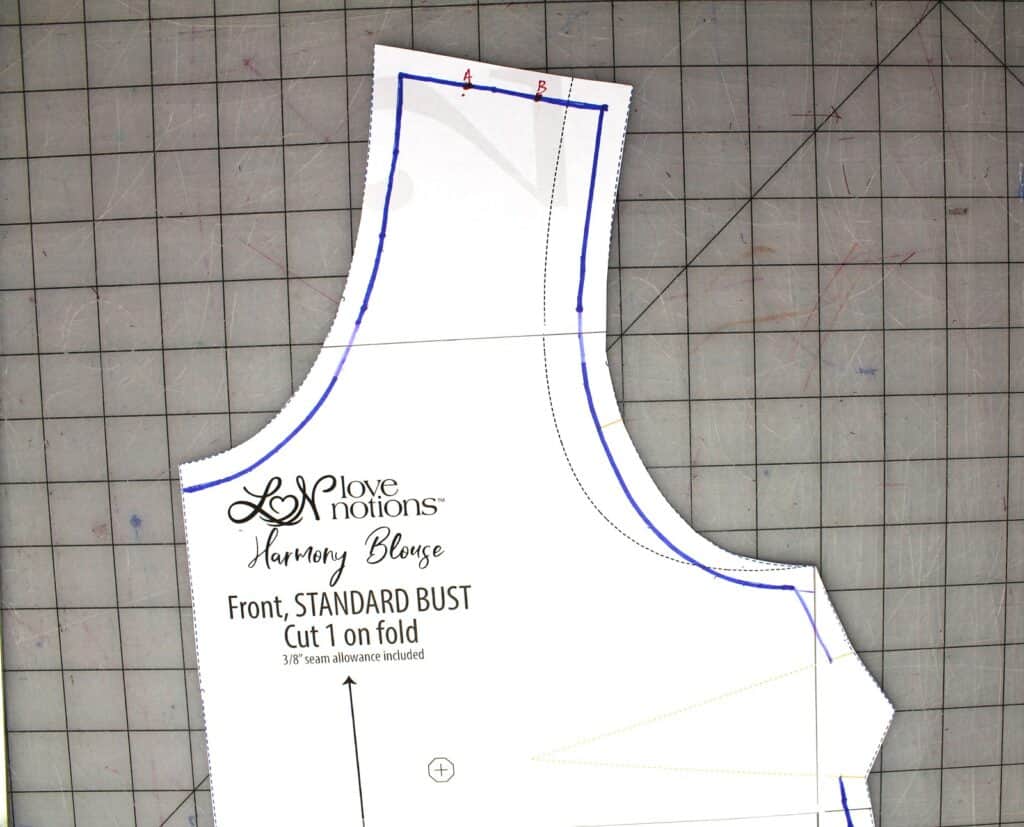
Shoulder Tucks Step 3:
On the Apex, label that point “C” and the dart point “D“.
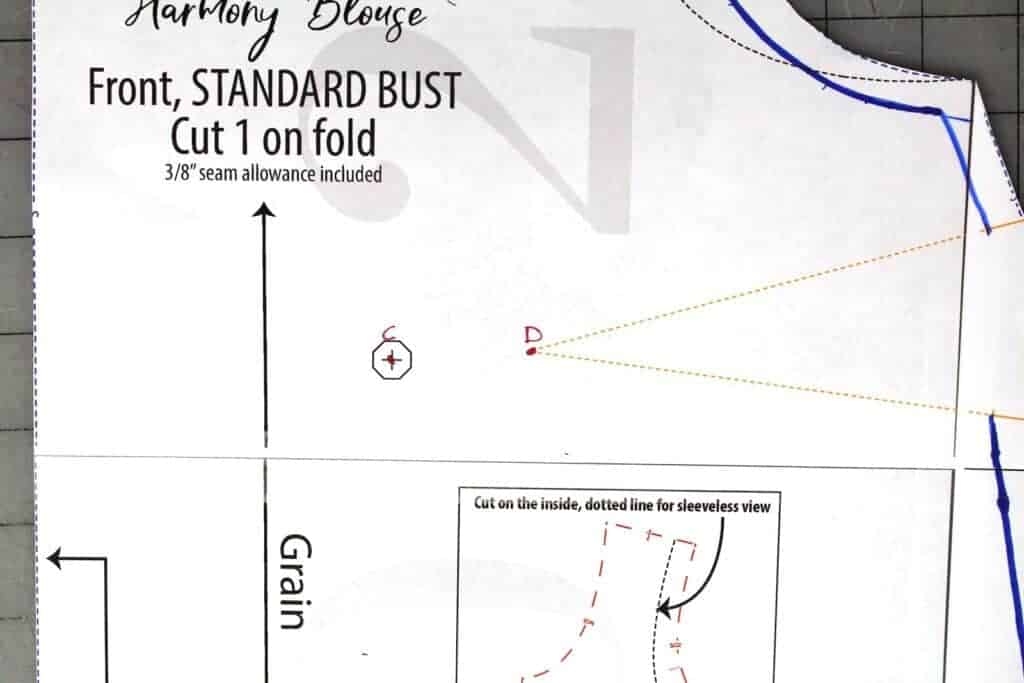
Shoulder Tucks Step 4:
Draw a line connecting points A-C and points B-D.
Shoulder Tucks Step 5:
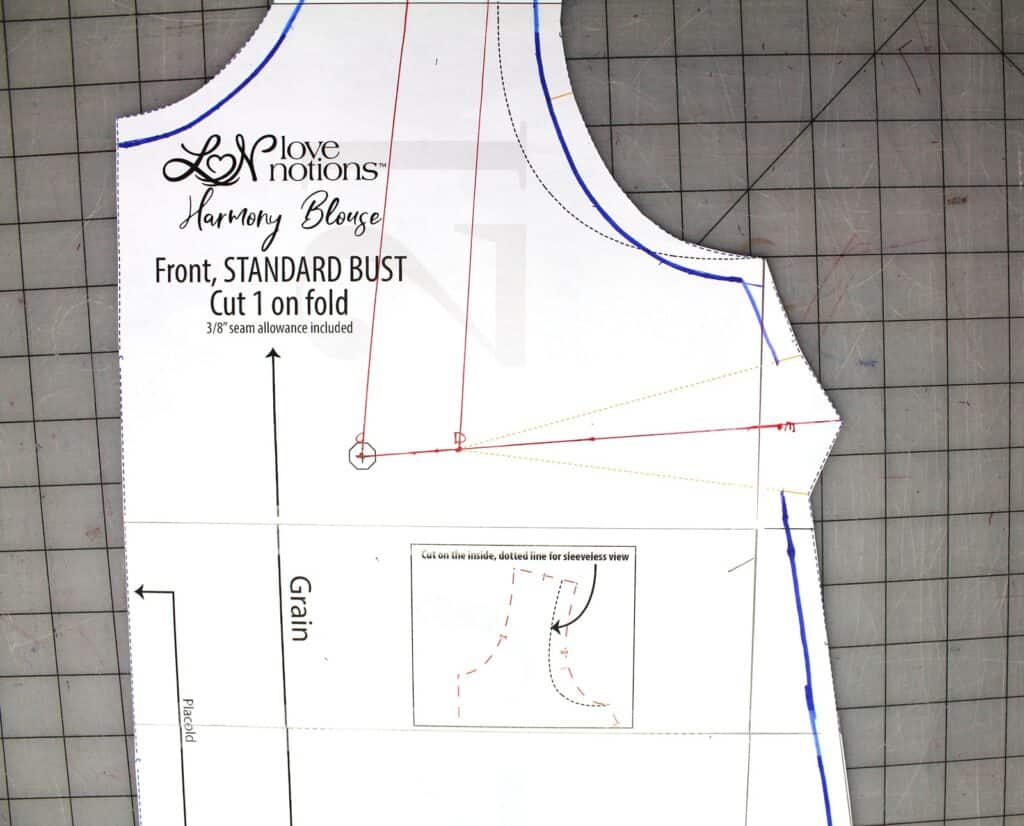
Make a line connecting C-D. In the picture (below) I show a line going through the center of the dart. Reason I did that was to keep the angle of the line connecting C-D in line with the Center of the dart and also I was planning to fold the paper on that line to close the dart. But I ended up just removing the dart completely so it was not necessary.
Shoulder Tucks Step 6:
Now let’s slash and pivot our dart to manipulate it to the shoulder. Make a cut from points A-C-D but not through D (D will be our hinge). Make a cut from points B-D but not through D. Make another cut from the end of the top dart leg to point D but not through D.
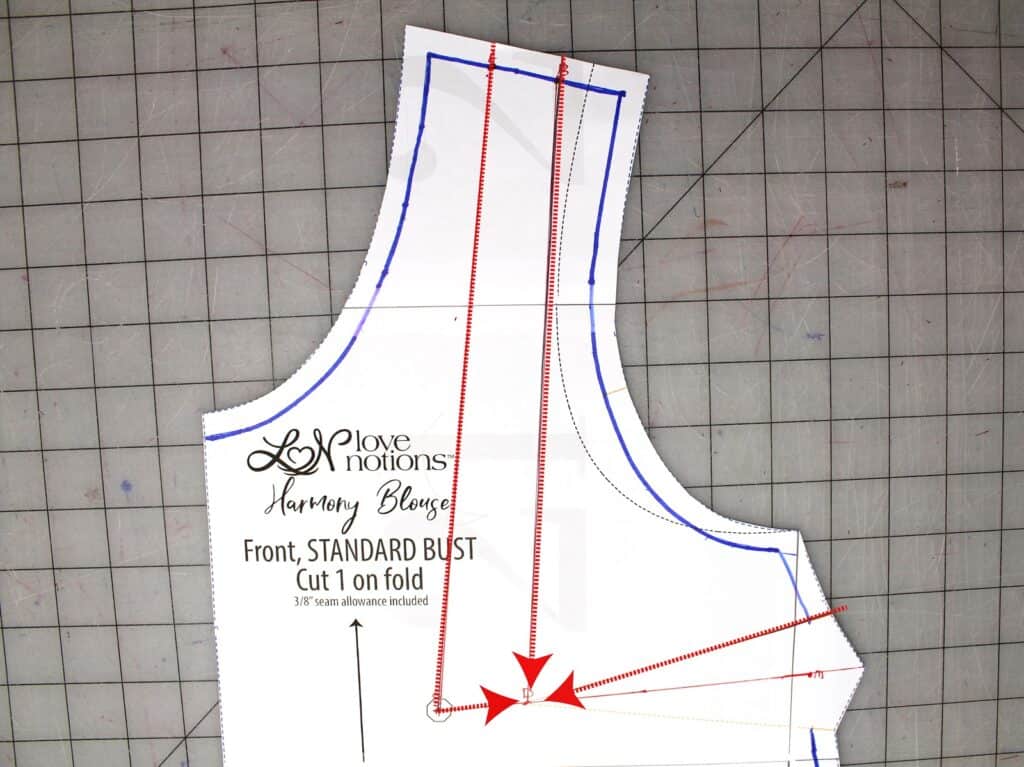
Shoulder Tucks Step 7:
Close your dart (have the top dart leg meet the bottom dart leg). By doing this, it will naturally move the shoulder pieces apart. Spread the shoulder pieces evenly apart. I have 2″ in between each piece to create a the tucks.
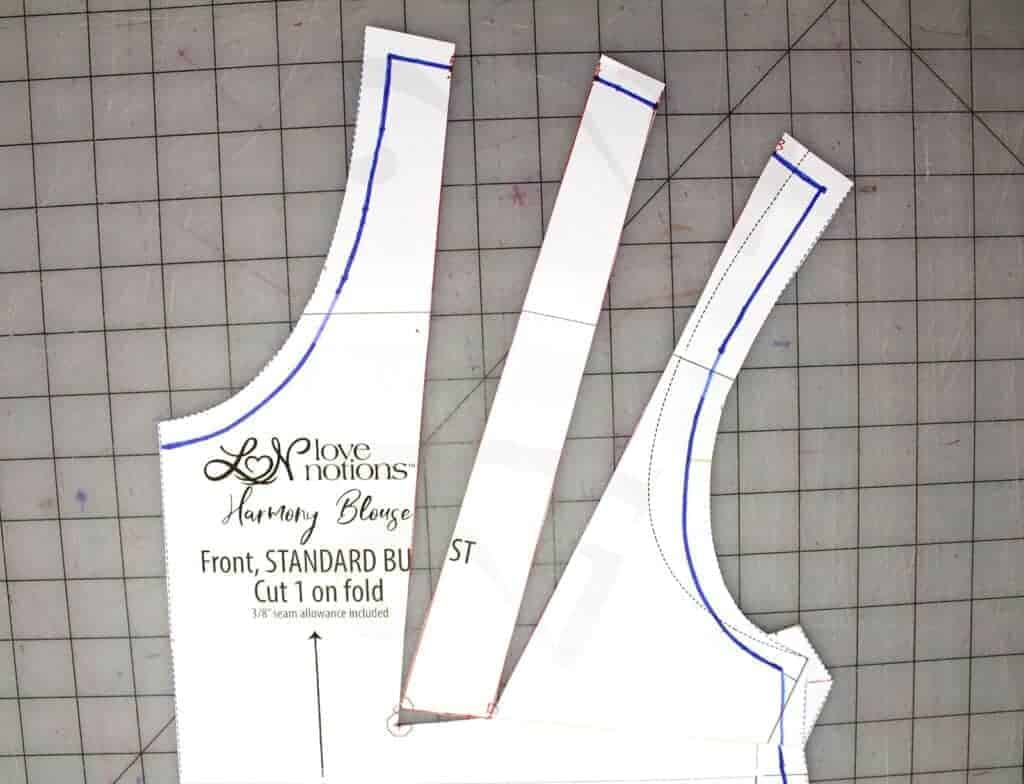
Shoulder Tucks Step 8:
Remove the dart and insert paper so we can tape down the pattern and fill in missing areas. (Shown with yellow paper.)
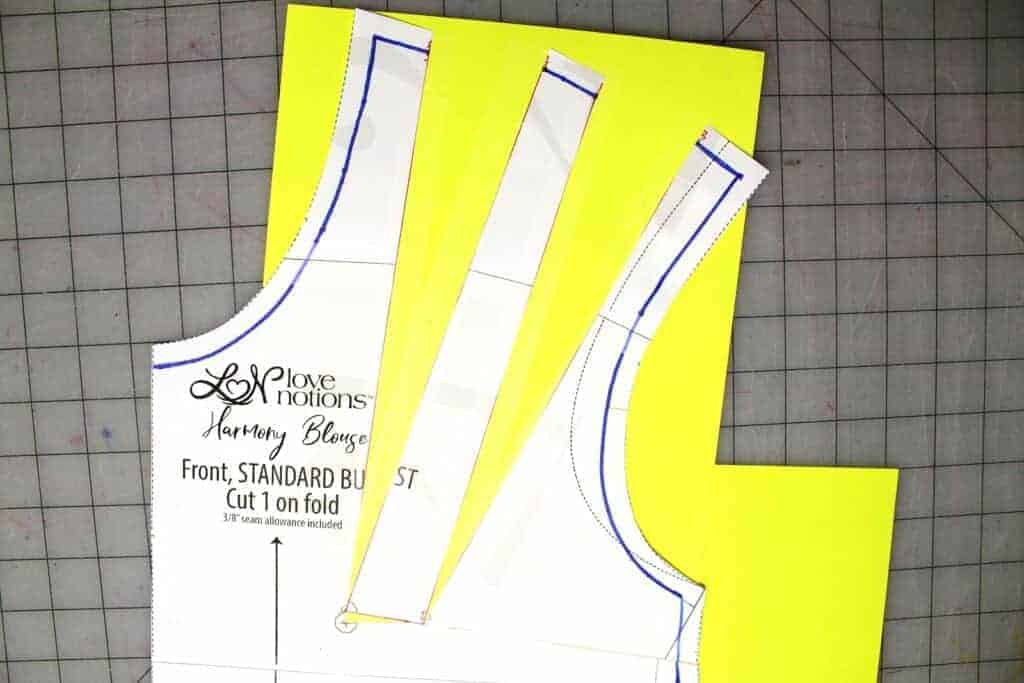
Shoulder Tucks Step 9:
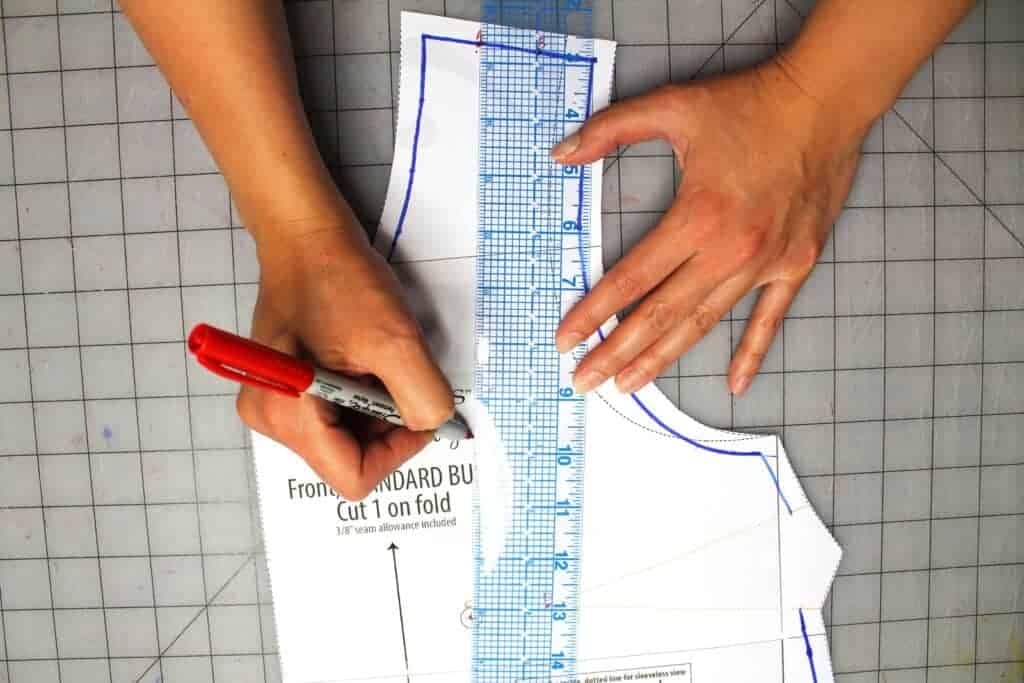
True your side seam. Around the area where the dart was originally. It will leave an inverted line and we need that side seam straight. Take your ruler and draw a line connecting and blending the stitching line. Add seam allowance back on the new stitching line.
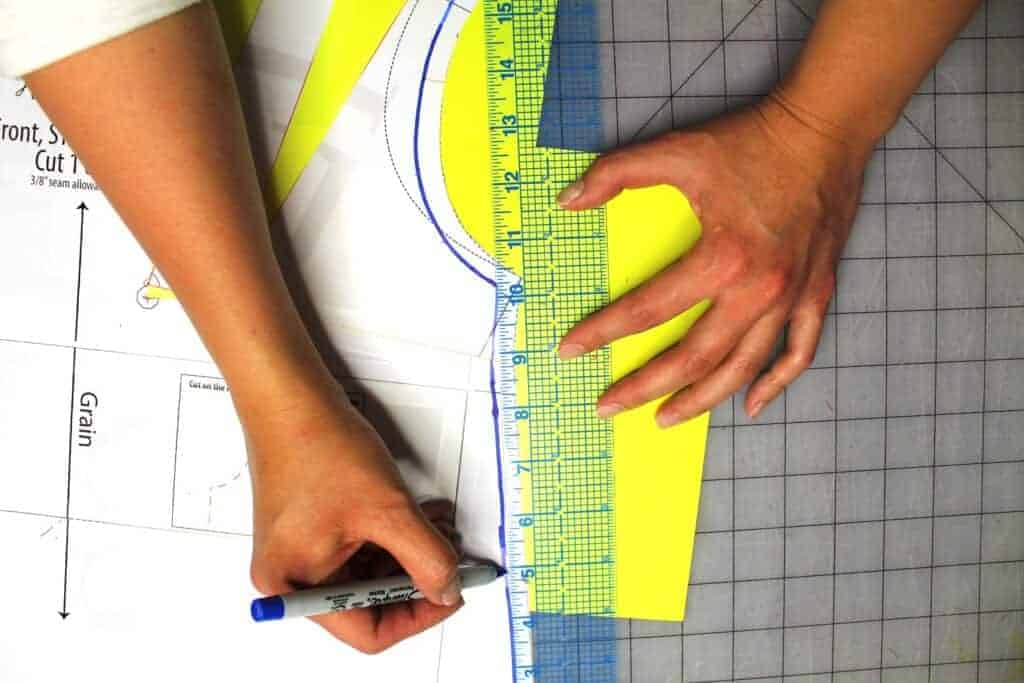
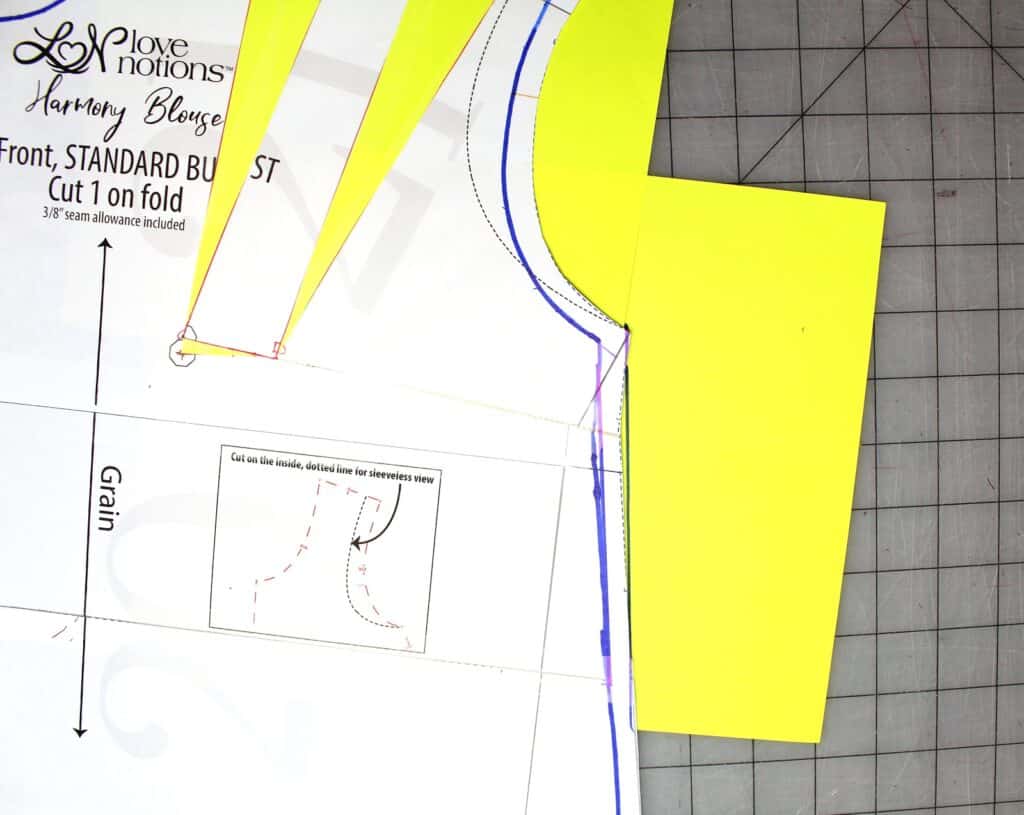
Shoulder Tucks Step 10:
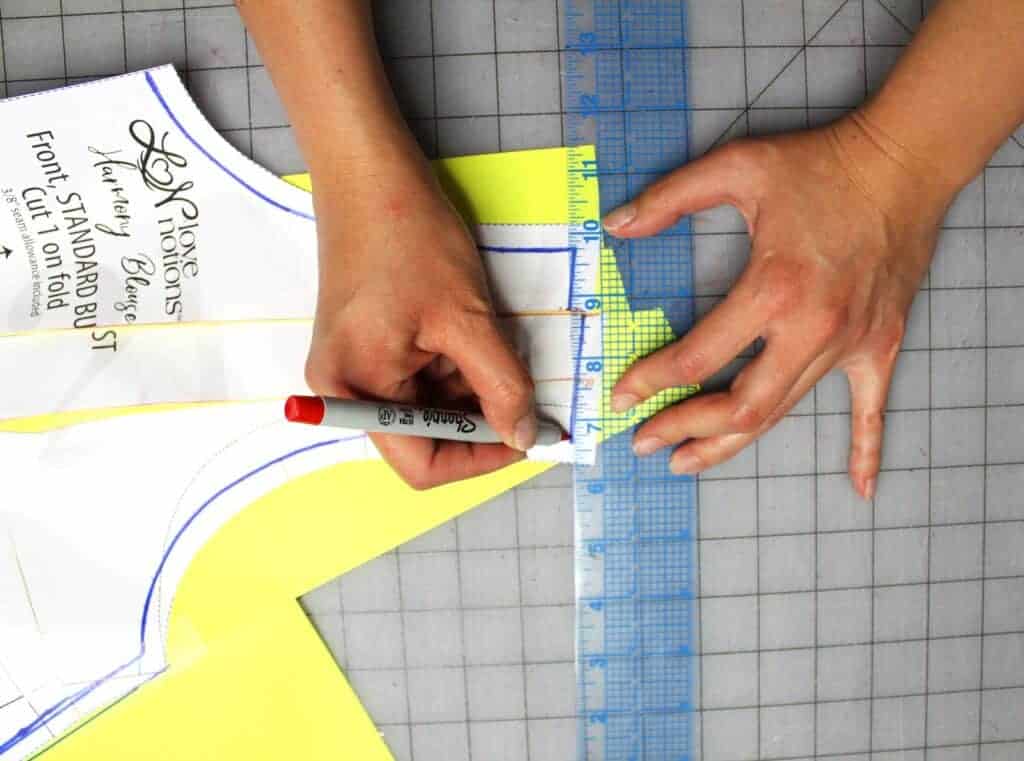
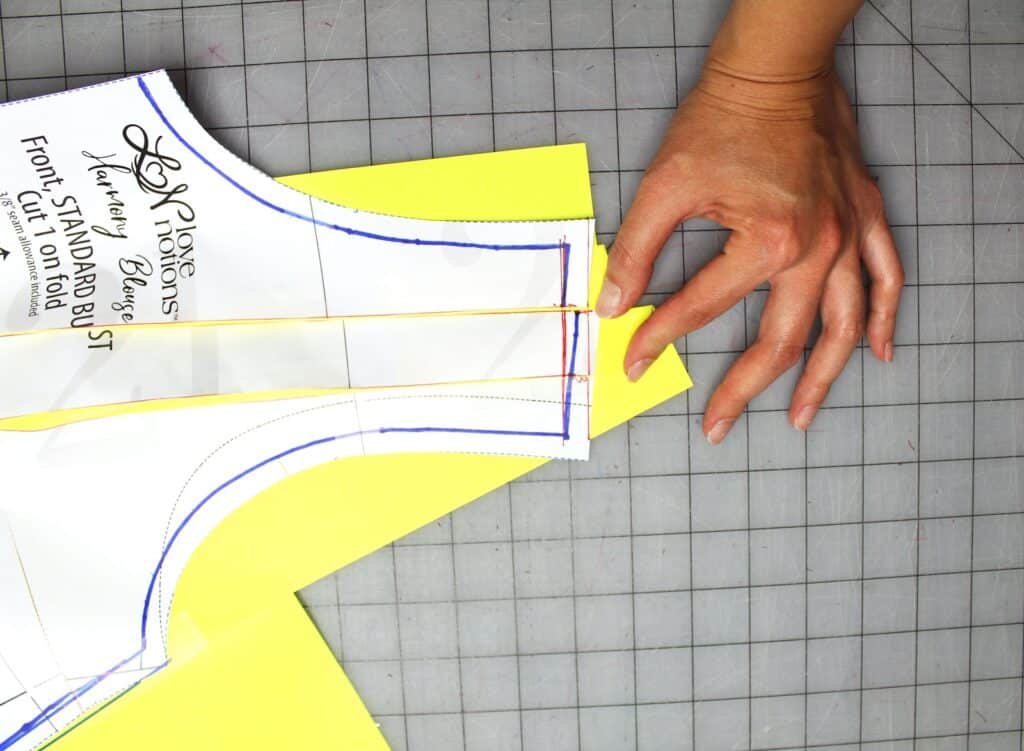
Now to true up the shoulder seam but before we do that we actually have to tuck our pattern piece in order. Fold the first A-Cline and it meet the second A-Cline. Repeat that again for lines B-D. I used my hands to hold the tucked paper down but you can use weights to temporarily to hold it in place so you can make the next adjustments.
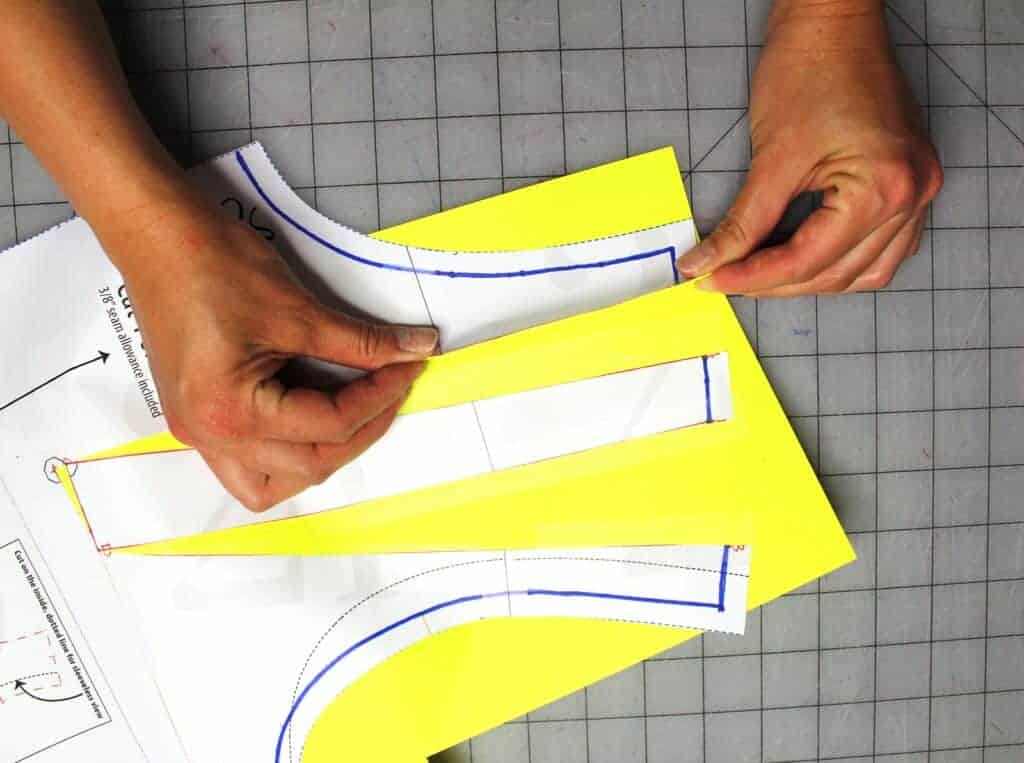
Make a fold to line A-C
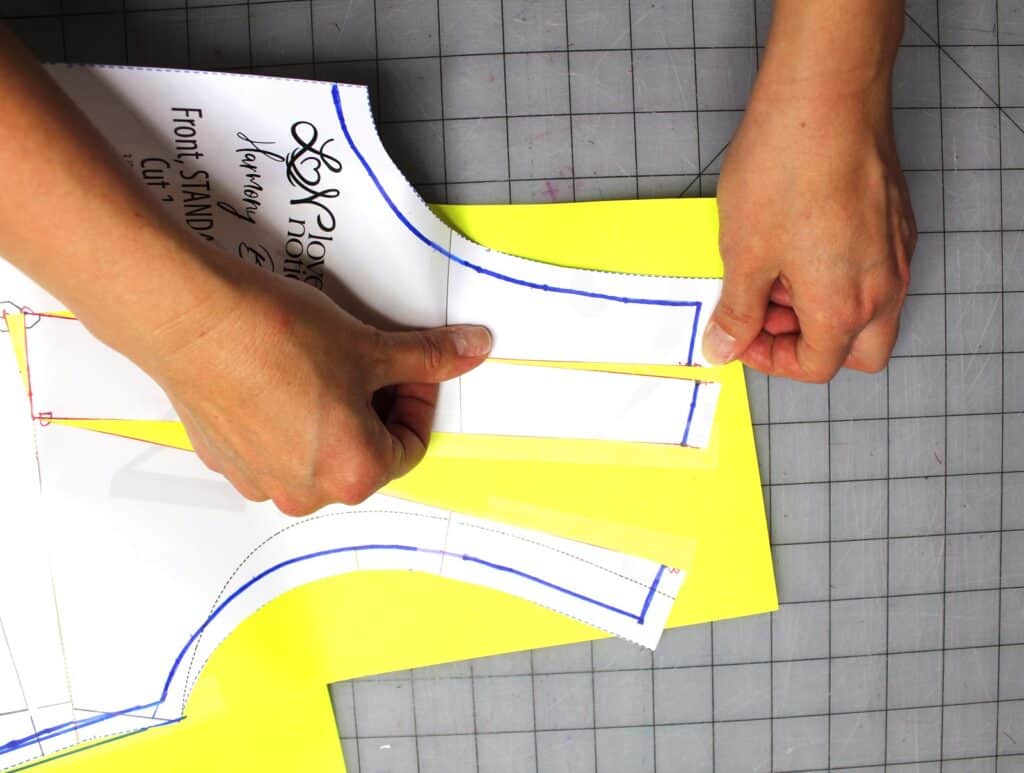
Have fold of A-C meet with the other A-C line
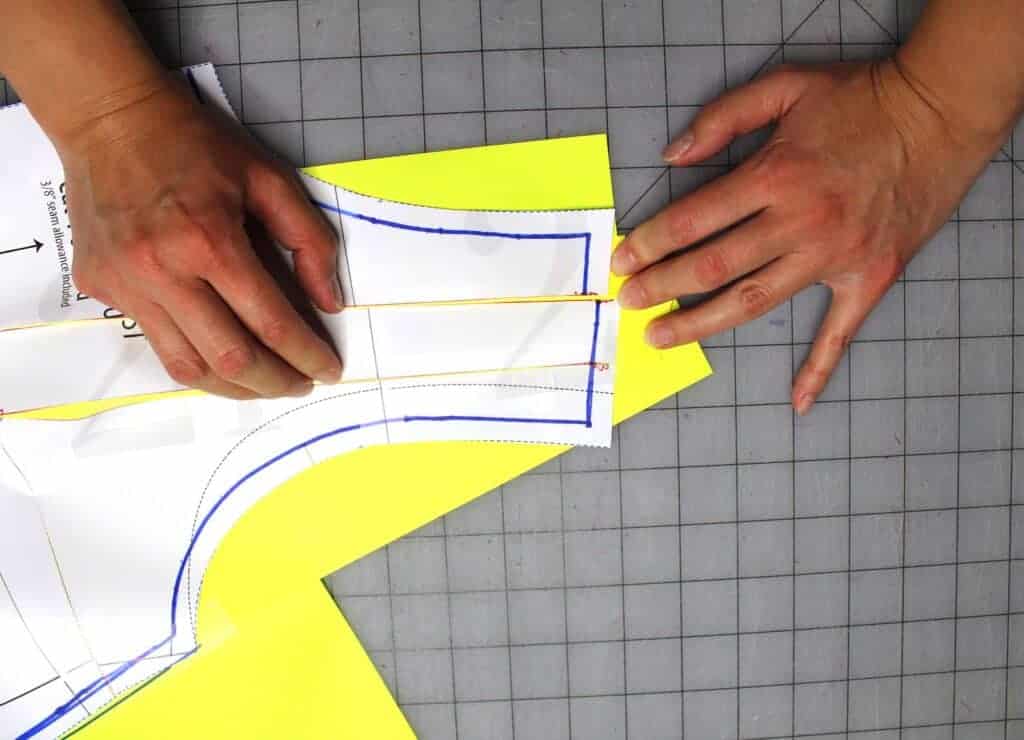
Repeat it again for line B-D
Shoulder Tucks Step 11:
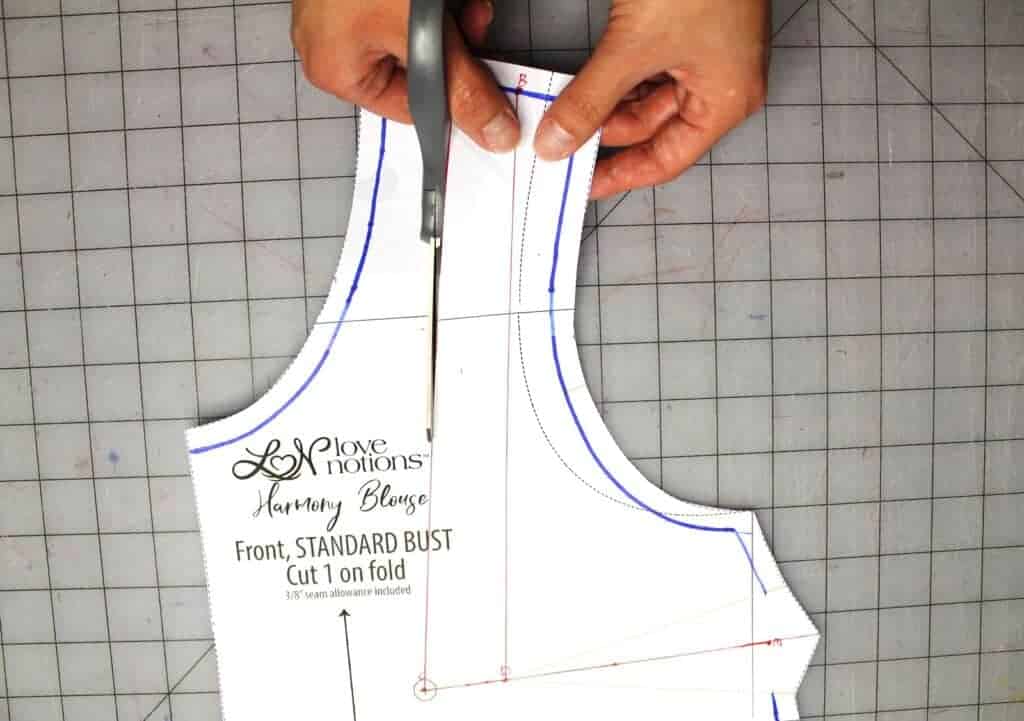
Make a new shoulder stitching line by connecting the two shoulder points on the pattern. Add seam allowance to the new shoulder line. Cut the pattern out along the seam allowance line while the pattern is still tucked.
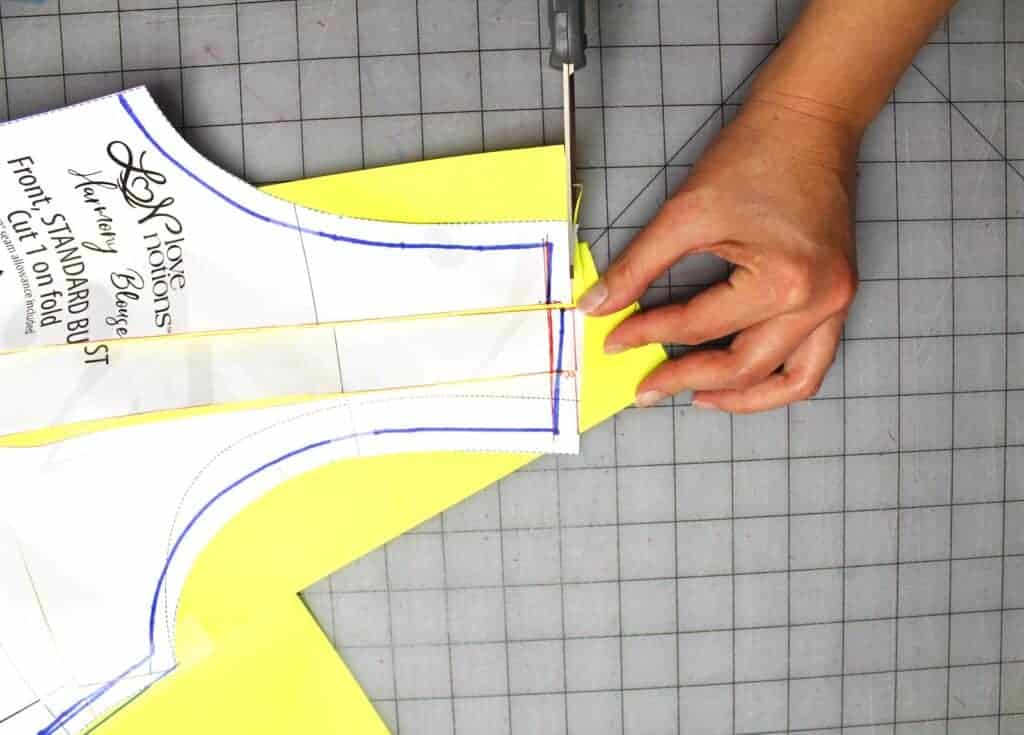
Cut your pattern out and it should look like this:
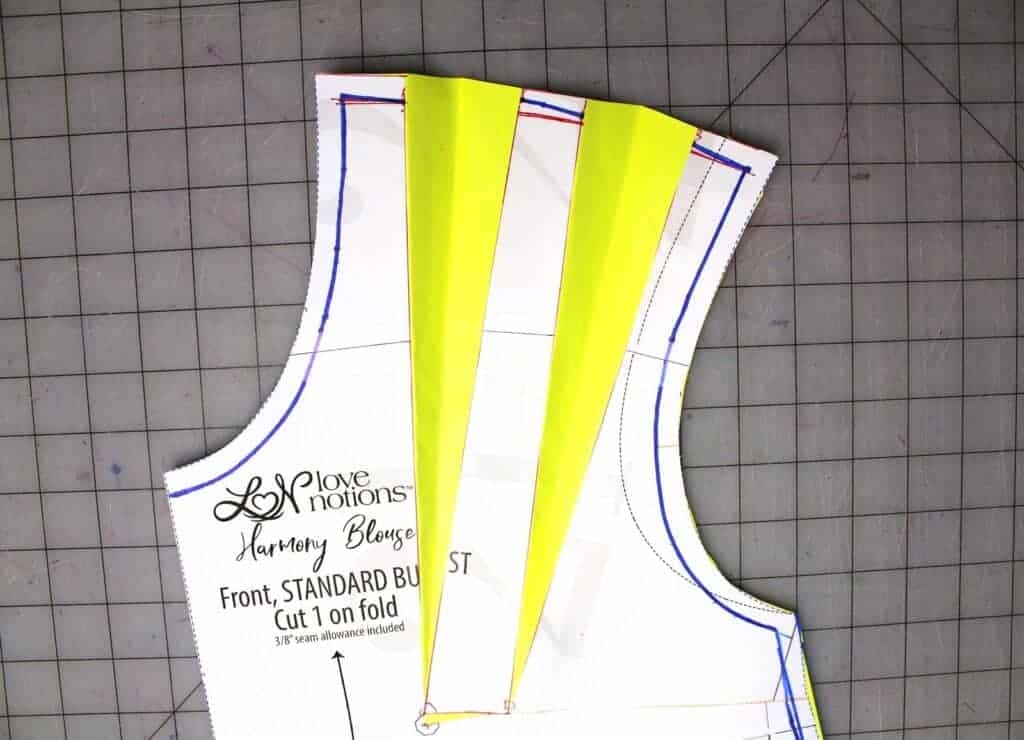
Shoulder Tucks Step 12:
Mark on your pattern with arrows to indicate in which direction the fabric should be folded. Also mark your pattern how far down you will need to stitch to create those tucks. I marked 3″ down from the shoulder stitching line and I annotated the pattern with dashes to indicate topstitching that will be done 1/8′ from the tuck seams.
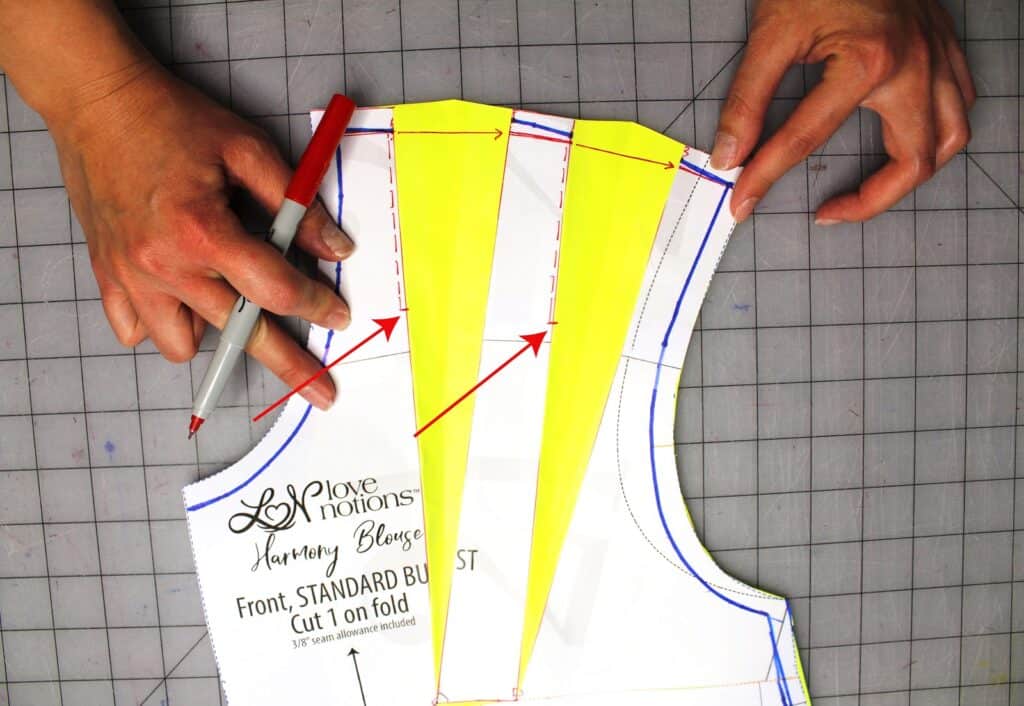
Now you are ready to cut out your pattern pieces on fabric. Sew the tucks first on the front bodice first before constructing the rest of the garment. Continue sewing the garment up as the instructions indicate.
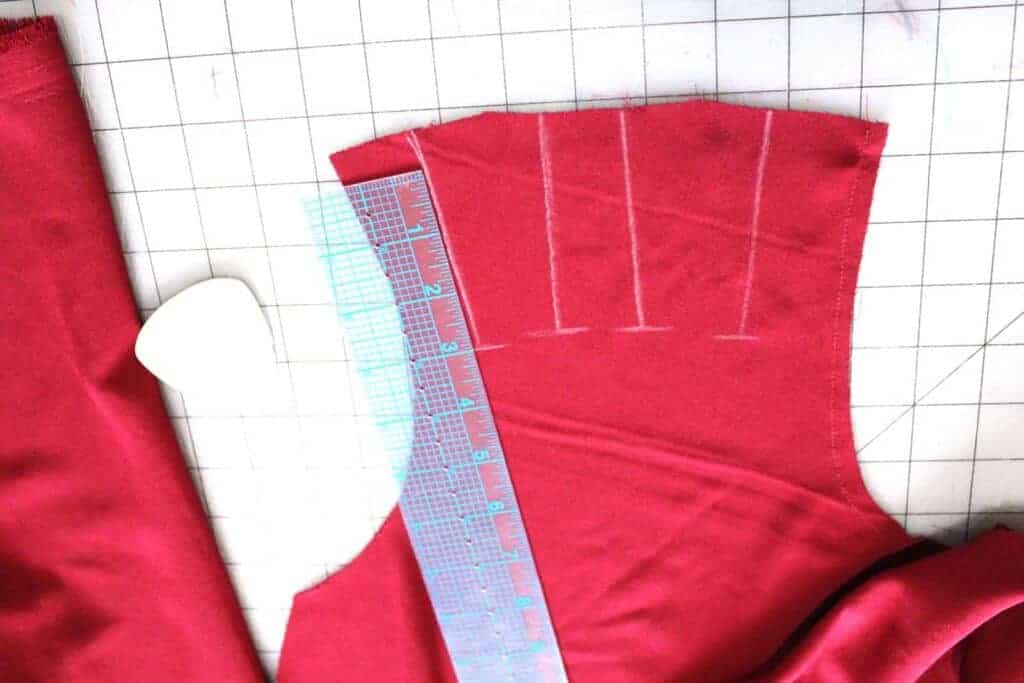
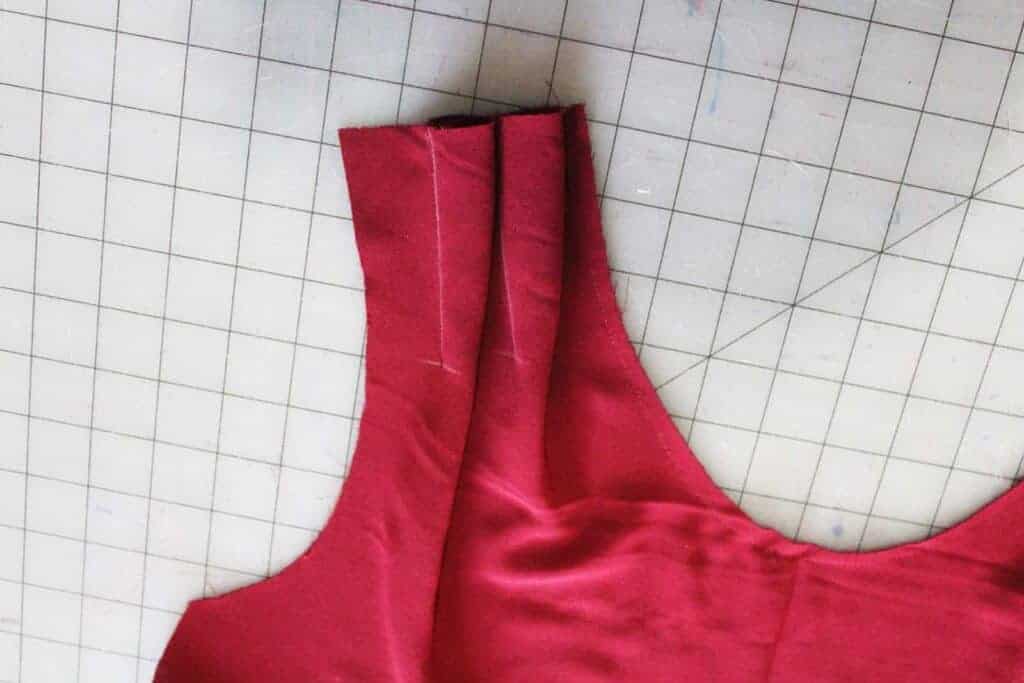
Top stitching on the pleats helps keep the folds lay flat in the direction they are supposed to be. Plus I think they add a good looking detail to the outside.
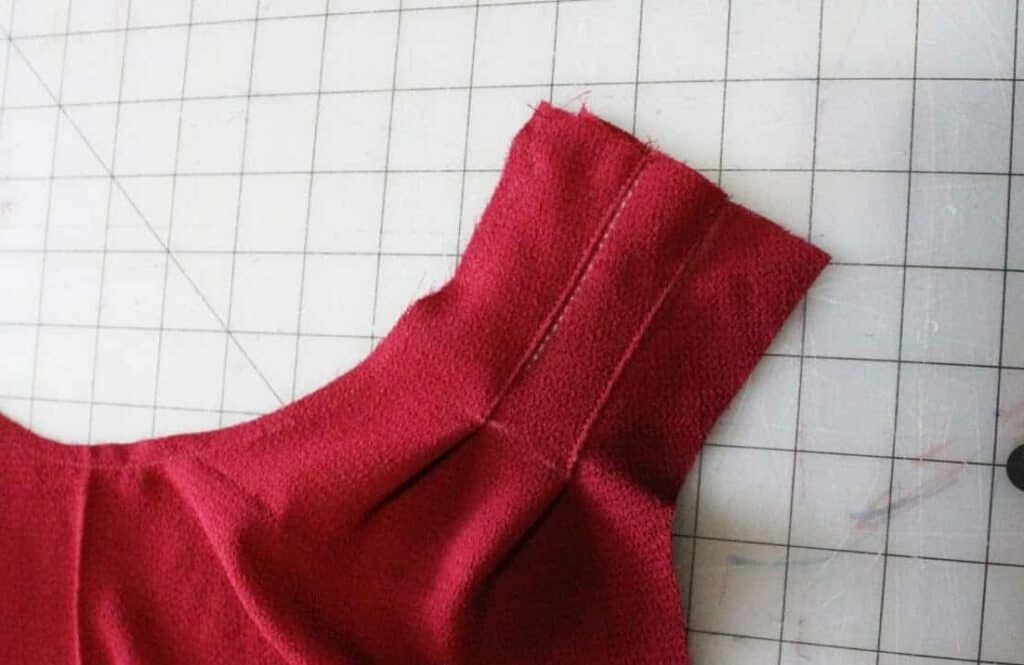
Harmony Blouse with Shoulder Tucks
Here is the top completed! It’s on sale for only one day during Feature Friday. So go get this staple piece pattern with so many possibilities!


 [/vc_column_text][/vc_column][/vc_row]


